I took a little holiday from the blog. It started with a proper holiday with no access to internet and then it kind of dragged on for a bit because I've been really busy. If only because I'm cooking another goosling, yep that's right, I'm expecting baby number 2 and it's making me feel tired and rubbish (and happy too, of course). I'll keep my pregnancy woes to a future post while I move on to what actually brought me back onto the blog: a pretty darn amazing mango chutney!
Yesterday, I spotted on my greengrocer's Facebook page (yes, they're funky like that at my local greengrocer) that they had boxes of 12 mangoes going for £2. I just couldn't resist the bargain and headed straight down to bag myself some of that sunny goodness.
But what to do with 12 mangoes? Why, chutney of course! It was my first attempt and I am proud to say, it's turned out so good that I have actually been tempted to eat the whole 2kg of chutney with a spoon. As I am generous like that, here's the recipe for those who would like to try it:
Ingredients:
- 1.3kg mangoes, diced in roughly 2cm cubes (weight when skinned and stoned) - it's best to use mangoes that are slightly under ripe as they'll hold their shape better
- 350g onions, finely chopped (weight when peeled and chopped)
- 2 garlic cloves, peeled and chopped
- 300ml white wine vinegar
- 550g sugar
- 1 orange
- 1 red chilli, chopped
- 1/4 teaspoon each of: allspice, cardamon seeds, ground cinnamon, coriander seeds, ground ginger, mustard seeds, peppercorns
- 4 cloves
- 2 bay leaves
Method:
- Tie the spices, red chilli, cloves and bay leaves in a muslin bag
- Put the onion, garlic, vinegar, mango and muslin bag in a pan
- Simmer gently for about 20 minutes until the fruit and the onions are getting soft
- Grate the zest of the orange finely and squeeze out the juice, add to the pan and cook for 5 more minutes
- Remove the muslin bag
- Add the sugar and stir over low heat until dissolved
- Bring to a steady boil and cook until it is the consistency of a soft rather than stiff jam
- Leave to cool for about 10 minutes before spooning into clean jars
And there you have it, a delicious mango chutney. If you try the recipe, let me know what you thought of it.
Showing posts with label Tutorial. Show all posts
Sunday, 7 September 2014
Saturday, 2 August 2014
Week 31: A t-shirt dress tutorial
It's been a great week. If only because I managed to make a second t-shirt dress and take enough pictures to write a tutorial. So here it is:
1. I've used a £2.50 t-shirt from Next. I measured on my daughter where her waist was and added a 1.5cm seam allowance. Before cutting, I put a strip of iron-on interfacing to stabilise the fabric.
2. I used the whole width of my fabric but measured the length of skirt I needed + 7cm of seam allowance. I then folded 2 cm at the top of the fabric and pressed it then repeated the operation. This folded edge will become the gutter in which to insert an elastic.
3. I stitched my gutter as close to the bottom edge as possible.
4. I measured a piece of sewing elastic to be roughly the same size as the cut edge of the t-shirt. To insert the elastic in the gutter, I tape it to the end of knitting needle and push it through.
5. Once you have inserted the elastic, pin it in place so it is flush with the raw edges of the fabric and as close to the seam you just made as possible.
6. I've used a French seam for this skirt, they're meant to be stronger for children's clothes. So, if you're new to a French seam, what you do is make a small seam (0.5cm) with the wrong sides of the fabric together.
7. You then turn your fabric inside out and do a larger seam (1cm) with the right sides together. That means there should be no raw edges showing on your seam.
8. By using this seam, the elastic will have been trapped twice in the seam as well.
9. At this stage, the skirt part is nearly done. You could just seam the bottom and use it as it is but as we're making a t-shirt dress, there's a few more steps for you to follow.
12. Pin the hell out of it so it won't shift when you're stitching it. While pinning, try and push the elastic towards the seam so it doesn't catch when you're stitching the skirt to the t-shirt and create bulky seams.
13. It's time to attach the two pieces together. I find it easier to have the t-shirt underneath so you have a smooth surface to "glide" on and you can keep an eye on the gathering of the skirt.
14. Finally, all that's left is to seam the bottom of the skirt. I've used a 1.5 cm seam folded and pressed twice.
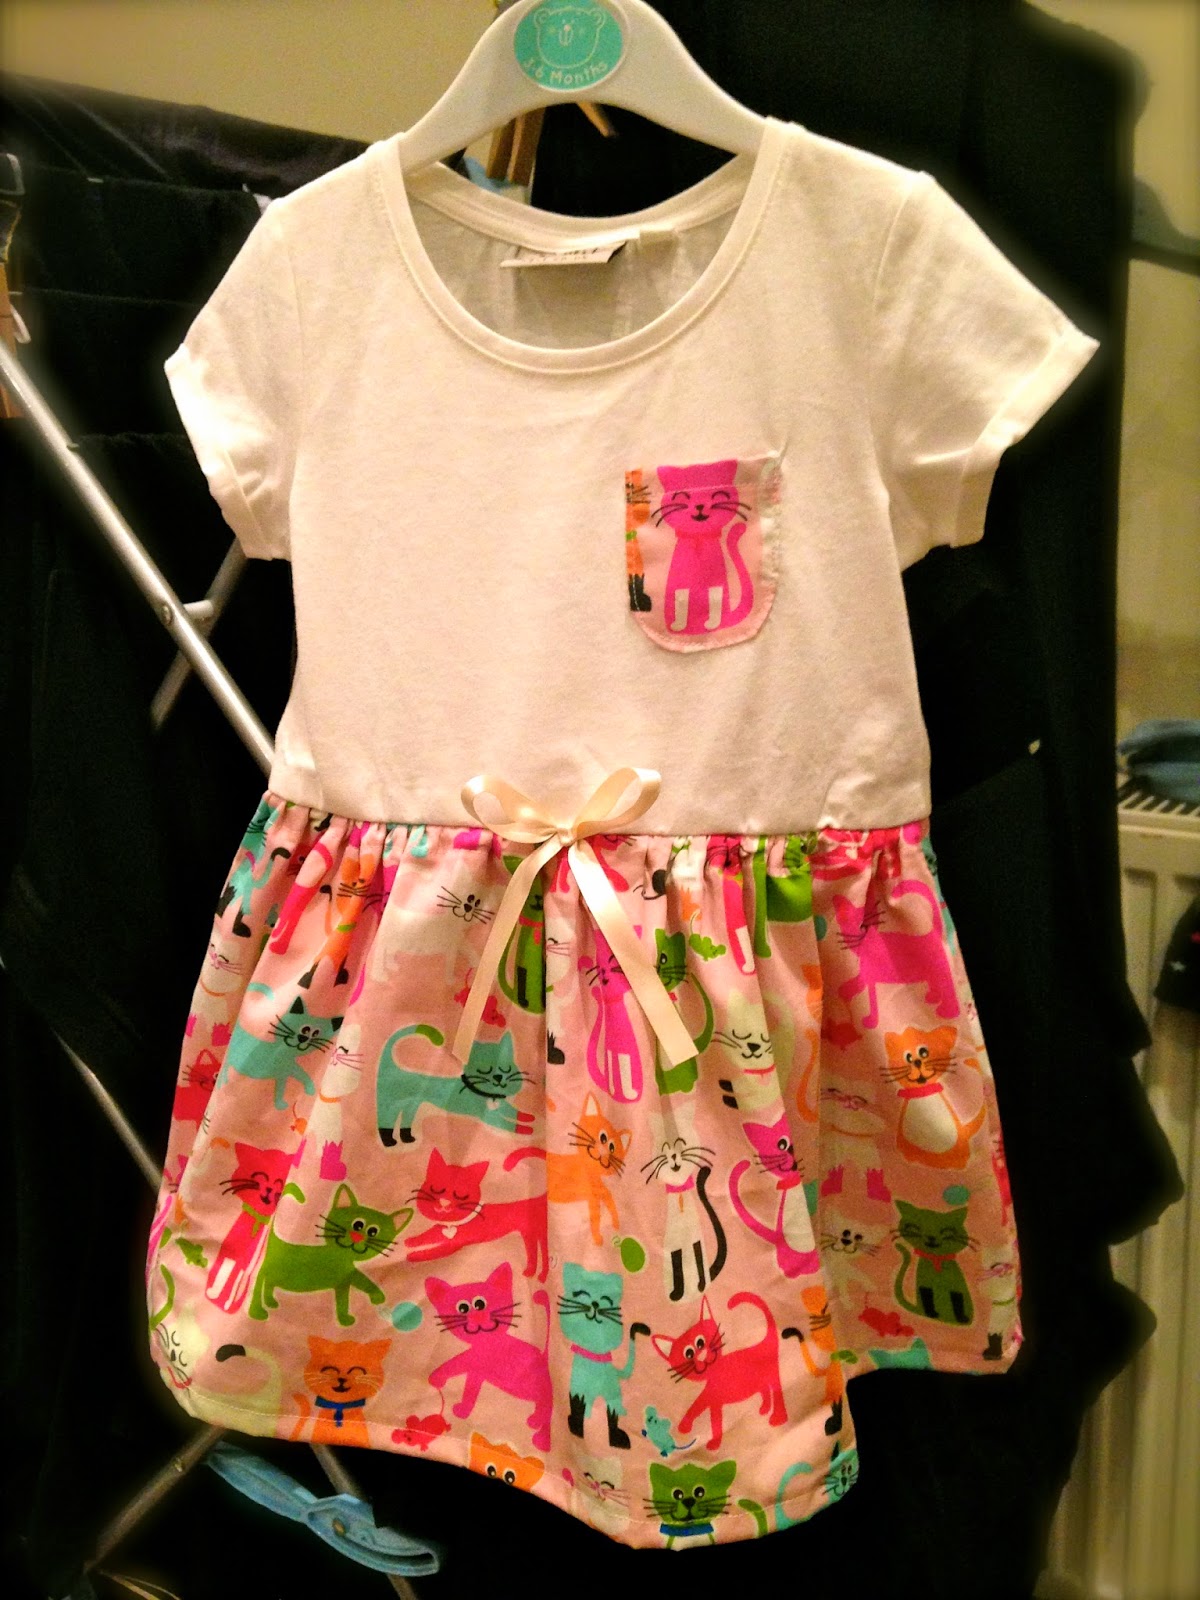
15. Et voilà, you have made a t-shirt dress! Well done you!
16. I've added a couple of finishing touches to mine. A pretty little ribbon at the front of the skirt and a a chest pocket. Not mandatory, but they're pretty.
My daughter was so excited to see her dress in the morning, she practically begged me to put it on. She then ran to the mirror to admire herself. Look at that proud grin! It made it so worthwhile!
1. I've used a £2.50 t-shirt from Next. I measured on my daughter where her waist was and added a 1.5cm seam allowance. Before cutting, I put a strip of iron-on interfacing to stabilise the fabric.
2. I used the whole width of my fabric but measured the length of skirt I needed + 7cm of seam allowance. I then folded 2 cm at the top of the fabric and pressed it then repeated the operation. This folded edge will become the gutter in which to insert an elastic.
3. I stitched my gutter as close to the bottom edge as possible.
4. I measured a piece of sewing elastic to be roughly the same size as the cut edge of the t-shirt. To insert the elastic in the gutter, I tape it to the end of knitting needle and push it through.
5. Once you have inserted the elastic, pin it in place so it is flush with the raw edges of the fabric and as close to the seam you just made as possible.
6. I've used a French seam for this skirt, they're meant to be stronger for children's clothes. So, if you're new to a French seam, what you do is make a small seam (0.5cm) with the wrong sides of the fabric together.
7. You then turn your fabric inside out and do a larger seam (1cm) with the right sides together. That means there should be no raw edges showing on your seam.
8. By using this seam, the elastic will have been trapped twice in the seam as well.
9. At this stage, the skirt part is nearly done. You could just seam the bottom and use it as it is but as we're making a t-shirt dress, there's a few more steps for you to follow.
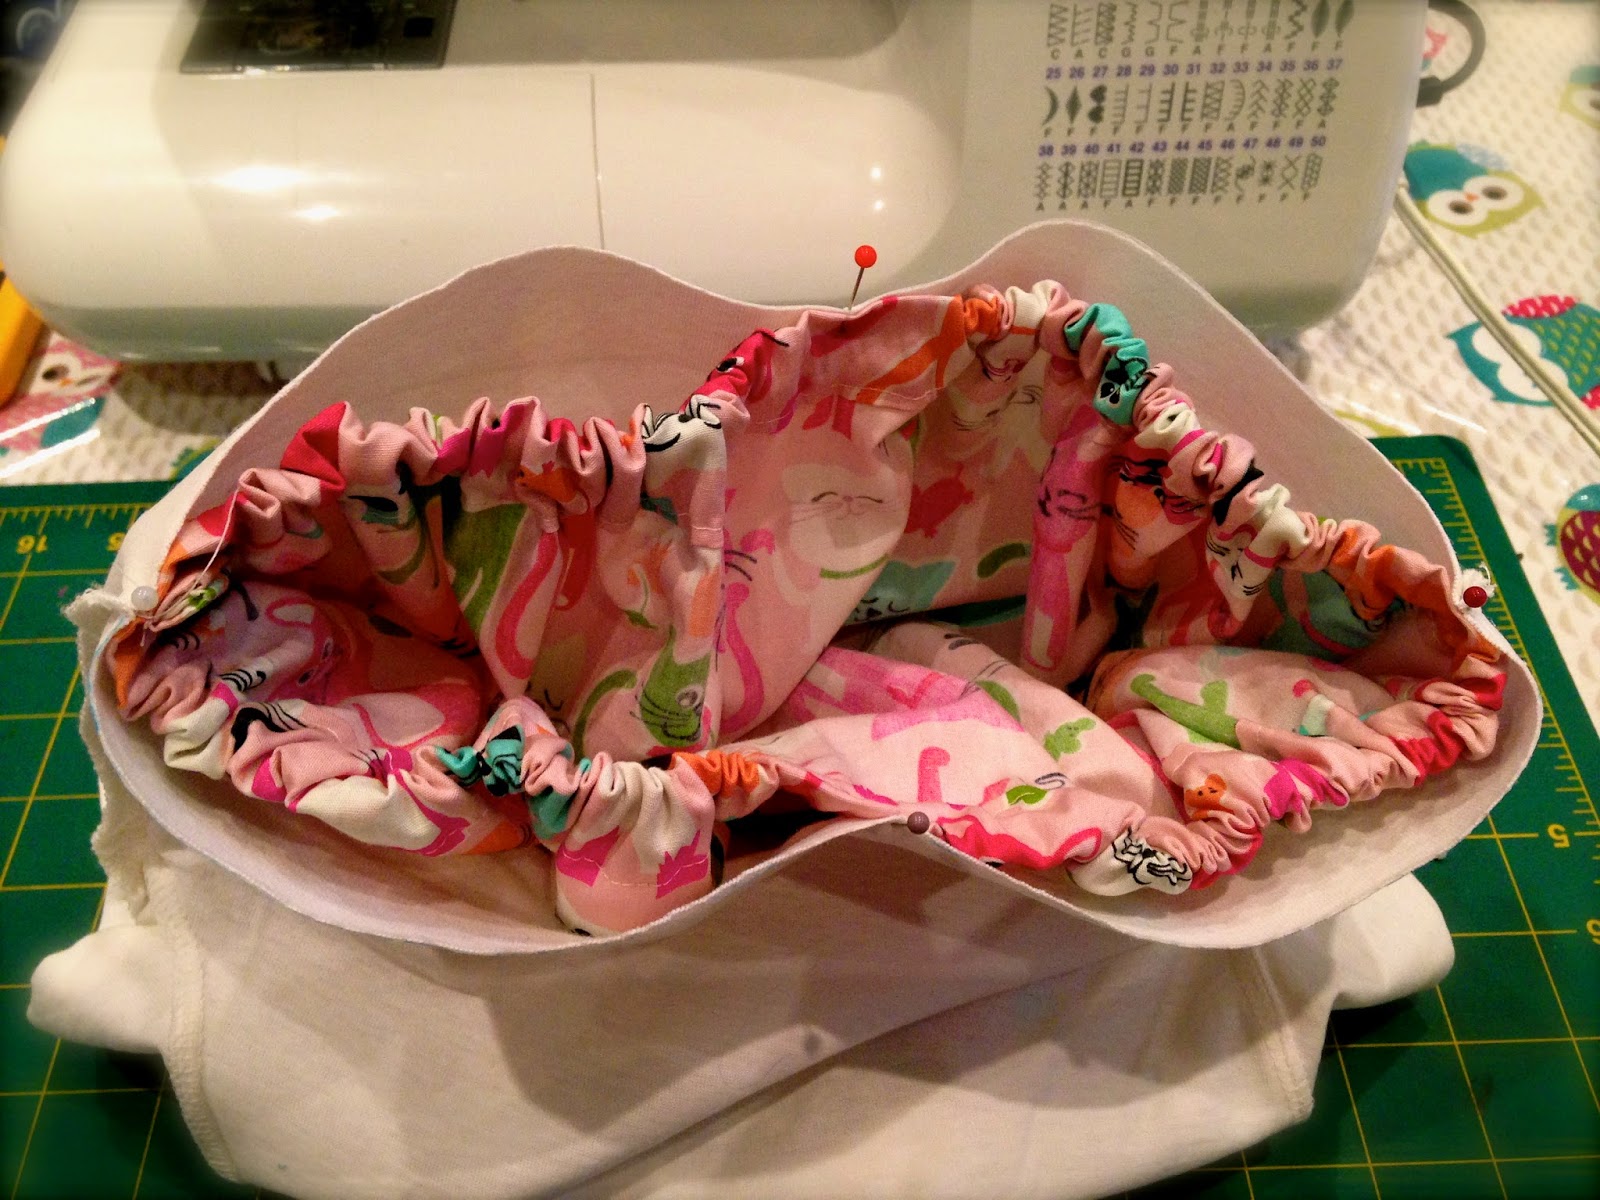
10. Mark the 4 cardinal points of you skirt with pins, so the two edges and the two middle points.
11. Do the same with your t-shirt and match them up, right sides together.12. Pin the hell out of it so it won't shift when you're stitching it. While pinning, try and push the elastic towards the seam so it doesn't catch when you're stitching the skirt to the t-shirt and create bulky seams.
13. It's time to attach the two pieces together. I find it easier to have the t-shirt underneath so you have a smooth surface to "glide" on and you can keep an eye on the gathering of the skirt.
14. Finally, all that's left is to seam the bottom of the skirt. I've used a 1.5 cm seam folded and pressed twice.
15. Et voilà, you have made a t-shirt dress! Well done you!
16. I've added a couple of finishing touches to mine. A pretty little ribbon at the front of the skirt and a a chest pocket. Not mandatory, but they're pretty.
My daughter was so excited to see her dress in the morning, she practically begged me to put it on. She then ran to the mirror to admire herself. Look at that proud grin! It made it so worthwhile!
I hope you enjoyed this tutorial. If you have any questions, feel free to ask!
Subscribe to:
Posts (Atom)