Showing posts with label baking. Show all posts

Monday, 3 November 2014

Week 44: Halloween

Well it's been a busy week! But it's also been a lovely week, filled with fun family activities, meetings with friends and everything themed halloween. Here's a little overview of everything that's been going on...

Our daughter is at that magical age where she can get involved with stuff and best of all, she wants to be involved. So we started the halloween festivities by turning pumpkin carving into a family activity. She had lots of fun spooning all the seeds out of the pumpkin and who knew, it makes for pretty good sensory play. Meanwhile, hubby tried his hand at carving for the first time. I think they both did and extraordinary job!

Nimue emptying the pumpkin

Hubby's handiwork

Lit up!

Lit up!
With two halloween parties to attend as well as a mummy and baby gathering, I made two big batches of cake pops, one vanilla (ghosts) and one chocolate (pumpkins). The ghosts didn't really turn out as well as I'd hoped, it's not clear whether they looked like ghosts or skulls or mummies but hey, they tasted alright and were well received by the kids, that's what matters right? In any case, there were none left by the end of the second party.


I also whipped up some quick healthy snacks for party number 2 as there were lots of kiddos there with health conscious parents. Thank you Pinterest for the idea!

Banana ghosts and satsuma pumpkins

Nimue, who loves dressing up, got to wear not one but two halloween outfits. I wish I could say I made them but the witch was a second-hand find and the monkey I bought new for just £6, there was no way something handmade could beat that price so... She did look gorgeous in both outfits though :-)

From witch...

... to monkey!
Finally, I just couldn't waste all the pumpkin flesh we'd scooped out when carving but, as neither my daughter nor my husband are particularly keen on pumpkin soup, I had to find something else to make with it. I really wanted to attempt a pumpkin pie but with very little time and no experience of making it or even knowledge of what it's meant to taste like, I gave up on the idea and opted for pumpkin bread instead. I went with the first recipe I found online and it worked out great, it was easy to make and tastes lovely and moist and spicy. I decided to top it with a cream cheese and orange icing and Nimue had lots of fun spreading it on.

Applying the icing. Pardon my very messy kitchen, it's been a busy week!
The finished product
After I'd ascertained the recipe was a winner, I made a couple more loafs and put them in the freezer for future consumption. That pretty much used up all of the leftover pumpkin flesh and any energy I had left after the week's activities!

I hope you enjoyed the halloween festivities too x

Tuesday, 28 October 2014

Week 43: It's beginning to look a lot like Christmas

Christmas prep has officially started in our house! I used to make most of my Christmas gifts, nowadays I'll settle for making a few. But with a toddler in tow, a baby on the go, work and a precarious house situation, I still have to start the prep early to ensure stuff actually gets done. On top of that, Christmas baking is usually best done in advance so it all takes a bit of planning.

I'm a firm believer in nothing beats homemade but I accept that sometimes, time constraints or cost of raw materials can be a bit of a dampener. That's not the case for mincemeat though, it is so easy to make and the ingredients are so readily available, it is totally worth making your own!

I use a trusted recipe by Delia Smith, can't beat Delia for the classics, right?

Ingredients:
- 450g ( or roughly 2)  Bramley apples, cored and chopped small (no need to peel)
- 225g of shredded suet
- 350g raisins
- 225g sultanas
- 225g currants
- 225g mixed candied peel
- 350g dark brown sugar
- grated zest and juice of 2 oranges
- grated zest and juice of 2 lemons
- 50g sliced almonds
- 4 tsp mixed ground spice
- 1/2 tsp ground cinnamon
- 1/4 tsp ground nutmeg
- 6 tbsp brandy

If only you could smell through the screen, this smells a lot like Christmas already!
Method:
- Mix all the ingredients, except the brandy, in a large bowl. Cover and leave to rest overnight.
- In the morning, pre-heat the oven at 110ºC, cover the bowl with foil and put in the over for 3 hours. It sounds like an awful long time but you do not need to stir the mixture while it's in the oven, just leave it in there and forget about it for the whole duration.
- After 3 hours, get the bowl out of the oven and give the mix a good stir. It will look like it is swimming in fat, that's ok, that's how it's meant to look like.
- Leave the mixture to cool on your kitchen countertop, stirring once in a while.
- When the fat starts to coagulate, add the brandy and give it all a good mix again.
- Pack in sterilised jars and that's it, you're done!


A few personal observations:
- I find it's best to make this mincemeat a few weeks in advance so the flavours get a chance to develop.
- Don't worry about the quantity it makes, if you store it in a cool dark place, it keeps for years!
- As you use the apples with peel still on and use the zest of the lemons/oranges, I would recommend using organic produce.
- For the suet, I use the veggie version as I have many veggie friends and I wouldn't want to deprive them but I have used the beef suet in the past and I can honestly say, both work equally well.
- You could change some of the ingredients to suit your liking. I reckon replacing the currants/sultanas with some cranberries would be pretty fab.

Enjoy!

Tuesday, 21 October 2014

Week 42: Make your own chocolate spread

It's not always doom and gloom in this little witch's world and while pregnancy definitely turns me into a grinch, not everything is cause for a moan.

Earlier this week, I ran out of chocolate sprinkles, which, served on bread, is the breakfast of choice for my Dutch compatriots. I'm not a huge consumer of the stuff but my hubby and daughter are quite partial to it and with no trips to the continent planned for a while, I had to come up with an alternative, quick! I hate the chocolate spreads out there, particularly Nutella, I know I stand very isolated on this one, but I can't find a single redeeming feature to the stuff. Luckily for me, I remembered having the recipe for a homemade chocolate spread in one of my Belgian cooking books and I still had quite a few slabs of good quality Belgian chocolate in my pantry so I decided to give it a go.


After I posted pictures of the finished product on Facebook, I got many requests for the recipe (and many volunteers for sampling!) so here it is by popular demand.

All you need is 3 ingredients, yes, just 3!

- 200g good quality dark chocolate*
- 200g butter
- 400g tin of sweetened condensed milk

* I can never emphasise enough how important it is to use good quality ingredients, especially when it comes to chocolate! I use Belgian chocolate that I bring back from the home country but failing that, my chocolate of choice would be Green & Black's cooking chocolate. Good chocolate needn't break the bank, Aldi and Lidl tend to have decent chocolate for a good price, just make sure it's got a high cocoa content.

Method:
- Put a glass bowl over a pan of hot water, making sure the water doesn't actually touch the bowl.
- Break the chocolate in small pieces and cut the butter in small cubes then melt the lot slowly in your glass bowl, stirring constantly.
- When all the chocolate and butter has melted, remove from the heat and stir in the condensed milk.
- Spoon the mixture in clean jars and that's it, you're done!


I can promise you this will work out cheaper than Nutella and taste a million times better. The only "snag" is that it needs to be kept in a cool place and consumed within a couple of weeks.

I can confirm that our daughter gave it her seal of approval the next morning. So did the few lucky neighbours who got to sample some.


A few personal thoughts on the recipe:
- It makes quite a lot for my little family to consume within a couple of weeks so I would consider halving the quantities next time.
- For a nuttier, crunchier spread, you could try adding finely chopped hazelnuts.
- For a more fancy spread, you could try adding a pinch of sea salt, chili or pink peppercorns, all of which work well with chocolate.
- I find the spread still a little too sweet to my liking so I might try making it with evaporated milk next time.
- For the coconut fans out there, I'm wondering whether you could replace the condensed milk with coconut milk and even the butter for coconut oil. Then you could also add a bit of desiccated coconut for a bit of texture?

Let me know if you give this recipe a go and particularly if you attempt any of my suggested alterations, I'd be curious to know what you thought of it.

Sunday, 7 September 2014

Week 36: Scrumptious mango chutney

I took a little holiday from the blog. It started with a proper holiday with no access to internet and then it kind of dragged on for a bit because I've been really busy. If only because I'm cooking another goosling, yep that's right, I'm expecting baby number 2 and it's making me feel tired and rubbish (and happy too, of course). I'll keep my pregnancy woes to a future post while I move on to what actually brought me back onto the blog: a pretty darn amazing mango chutney!


Yesterday, I spotted on my greengrocer's Facebook page (yes, they're funky like that at my local greengrocer) that they had boxes of 12 mangoes going for £2. I just couldn't resist the bargain and headed straight down to bag myself some of that sunny goodness.

But what to do with 12 mangoes? Why, chutney of course! It was my first attempt and I am proud to say, it's turned out so good that I have actually been tempted to eat the whole 2kg of chutney with a spoon. As I am generous like that, here's the recipe for those who would like to try it:

Ingredients:
- 1.3kg mangoes, diced in roughly 2cm cubes (weight when skinned and stoned) - it's best to use mangoes that are slightly under ripe as they'll hold their shape better
- 350g onions, finely chopped (weight when peeled and chopped)
- 2 garlic cloves, peeled and chopped
- 300ml white wine vinegar
- 550g sugar
- 1 orange
- 1 red chilli, chopped
- 1/4 teaspoon each of: allspice, cardamon seeds, ground cinnamon, coriander seeds, ground ginger, mustard seeds, peppercorns
- 4 cloves
- 2 bay leaves

Method:
- Tie the spices, red chilli, cloves and bay leaves in a muslin bag
- Put the onion, garlic, vinegar, mango and muslin bag in a pan
- Simmer gently for about 20 minutes until the fruit and the onions are getting soft
- Grate the zest of the orange finely and squeeze out the juice, add to the pan and cook for 5 more minutes
- Remove the muslin bag
- Add the sugar and stir over low heat until dissolved
- Bring to a steady boil and cook until it is the consistency of a soft rather than stiff jam
- Leave to cool for about 10 minutes before spooning into clean jars

And there you have it, a delicious mango chutney. If you try the recipe, let me know what you thought of it.

Sunday, 20 July 2014

Week 27, 28 & 29: Playing catch up

So it seems I haven't posted for the past 3 weeks, eek!

Early July was just a bit frantic with work, it was quarterly reports time and that's always time consuming and a bit stressful. I seem to remember crashing with exhaustion one Sunday evening and saying "fuck it" to writing the blog. Sorry!

Then last week I was armed with good intentions but I was defeated by my internet provider who conked out on me for the whole evening, just as I was ready to write my update. I thought I'd just write on the Monday instead but I forgot, oops! Re-sorry!

So what's happened these past few weeks? well, loads! Some good like my daughter developing an entire vocabulary nearly overnight and my planning a street party with my super duper neighbours, some not so good, like losing (albeit temporarily) a client and thus a huge chunk of my income on the same day my hubby got a gig cancelled on him, leaving us in a rather precarious financial situation.

I have cried and worried and not slept over this whole work and money thing but I'm keeping faith that this is just a period of change and that something wonderful is just around the corner for hubby and me. We just need to ride this storm and keep thinking of new ways to generate an income and somewhere down the line, we'll realise this was a key turning point for us, one that was scary but probably needed.

As always, there's been much baking and cooking. A couple of noteworthy experiments were frozen yoghurt lollies and Swedish cinnamon buns.

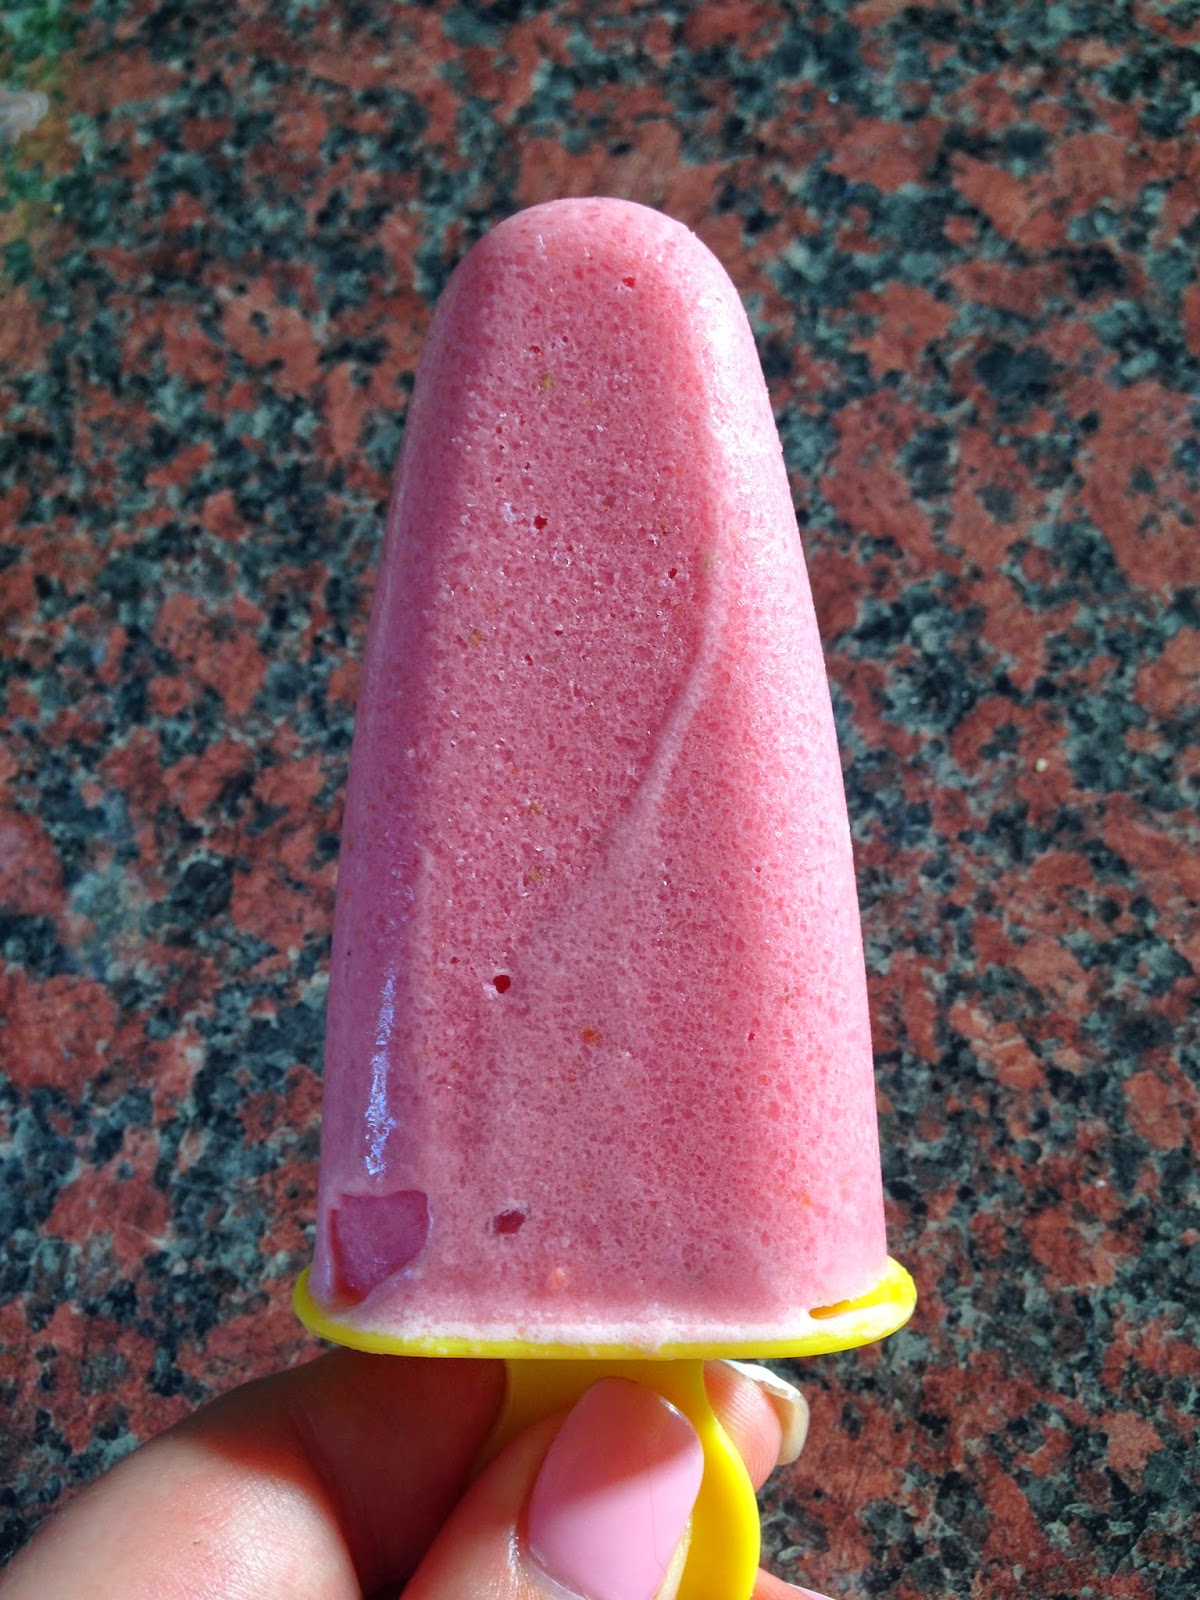
For the frozen yoghurt, I simply blended strawberries with greek yoghurt then sweetened to taste.
I then put the mixture in a tub and left it in the freezer for a few hours until frozen through. Then I whizzed the frozen yoghurt in the blender again. That's to break down large ice crystals and add a bit of air to the yoghurt, thus making it softer.
Once blended, I transferred the yoghurt to lolly moulds (Ikea sells some cheap ones) and left them in the freezer for a day.
The big test of course is whether or not our little madam will like them but they were an instant hit.
The finished product


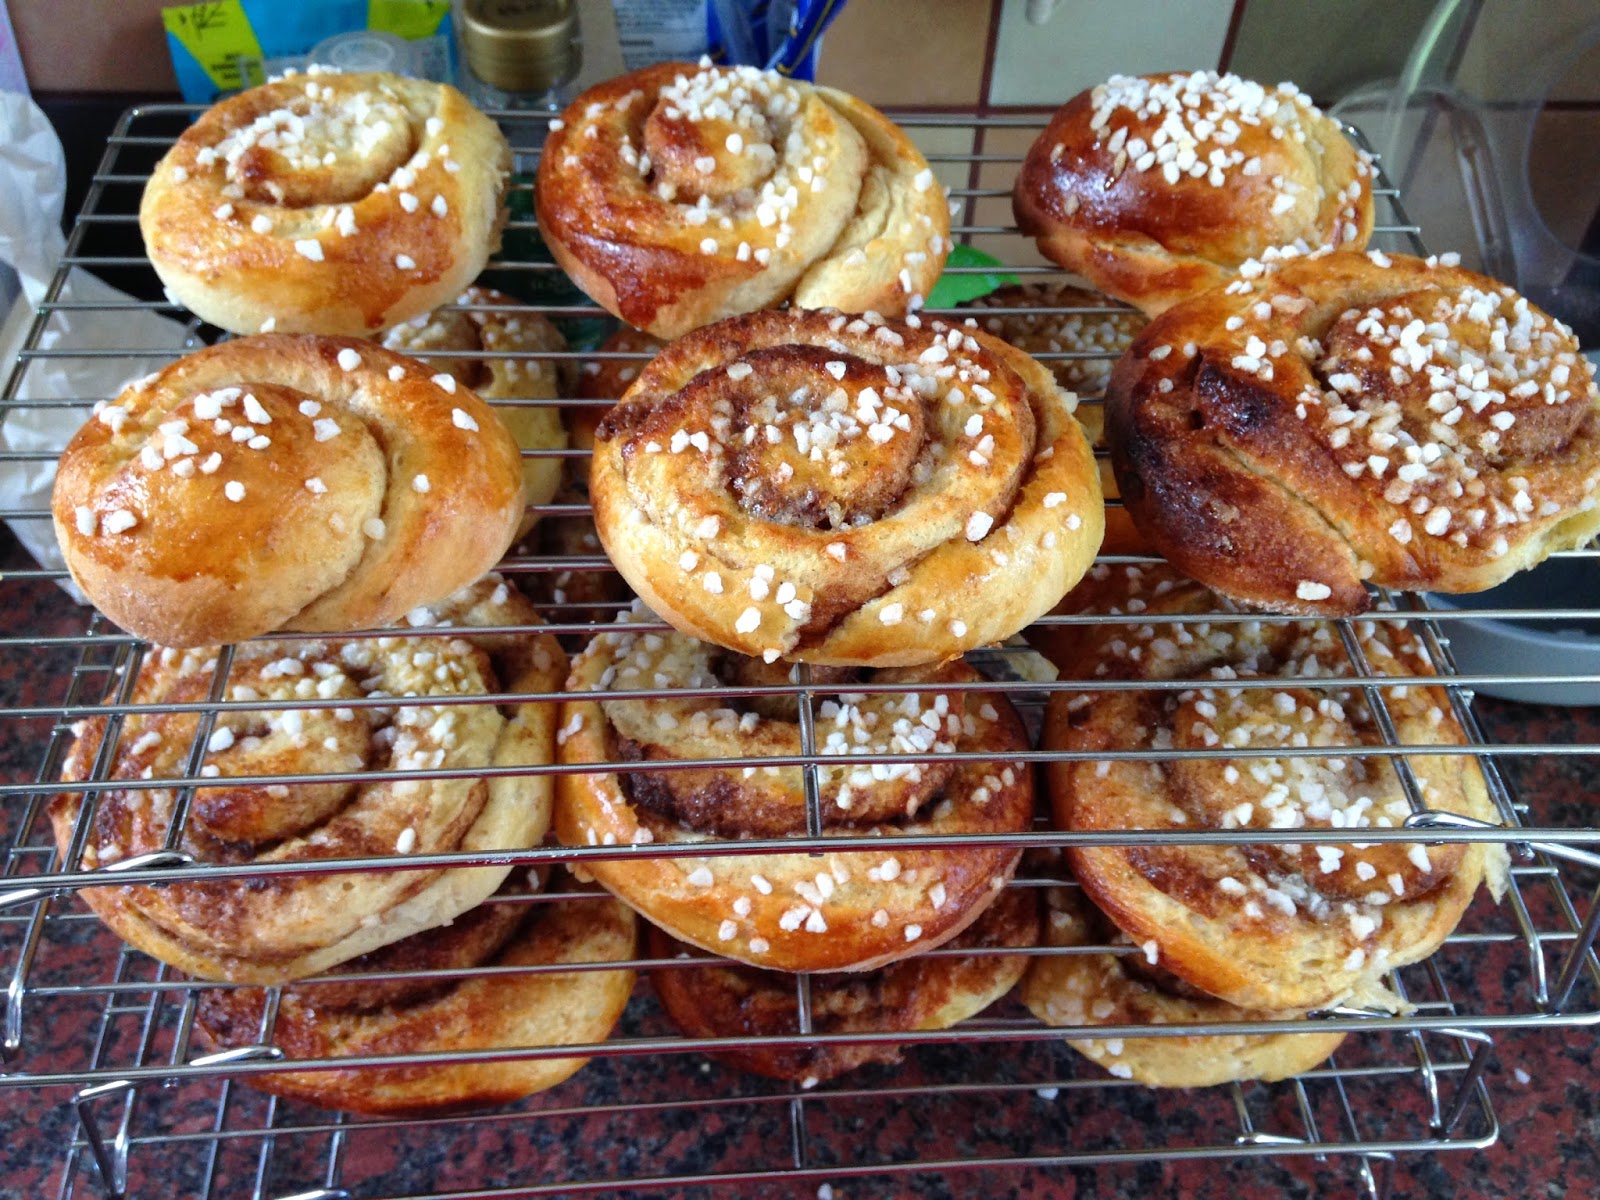
I can't really take credit for the cinnamon buns other than I asked my swedish colleague for her recipe. After that, I entrusted it to my expert husband and he went to work with it. The finished product was a bit on the large side but they were really delicious. We'll be giving these a go again in the near future.

The dough pre-being rolled

The buns ready to go in the oven

The finished buns. Nom nom!
I haven't been very productive on the craft front, instead I have spent a lot of time reading. I think after all the stress and worry of the last few weeks, I just needed the quiet contemplation that reading a good novel offers.

Until next time dear readers!

Sunday, 15 June 2014

Week 23 & 24: Baking for the win

I wasn't able to post last week as we had friends over for the weekend and I didn't want to be a poor hostess, spending more time behind my laptop than talking to my guests. To be fair, it would have been a short update anyway as work took up a lot of my time so it works out well having this update covering two weeks. 

Among our visiting friends was a birthday girl, so naturally we had to bake her a cake. One of my favourite cakes ever is the traditional red velvet. I know it's wrong, all that colouring just can't be good for you, but I really like the taste of it and the dramatic effect when you cut through it. The weekend before, Simon Rimmer was presenting his version of the red velvet cake on Sunday Brunch (Channel 4) so I thought I'd try his recipe. As I was making it, I couldn't help but feel the proportions were all wrong. The cake came out looking ok but when I tasted it, I was quite disappointed. It was quite dense and quite dry, not at all what I'd want from a red velvet. In saying that, it was perfectly edible and our birthday girl loved it but in our household, baking is a skill and we're pretty critical. I certainly won't be using this recipe again. 


While I was baking a cake, hubby did what he does best and baked a bread, but not just any bread, a "Fries Suikerbrood" otherwise known in English as a Frisian sugar bread. I used to have a craving for these during pregnancy but we hadn't made any since. As you can imagine, this is loaded with calories but it is oh so moorish and delicious! Especially when made by the master baker himself.

I mentioned in my previous update that I was preparing for a baking competition. Well, the time came this week. I can't remember if I've said before that I'm a member of the WI but this was our local WI's bake off. I'd planned to put in two entries: red velvet cake pops in the shape of apples and the rhubarb and custard cake I'd been practising. As there was a category for jams and chutneys, I made the last minute decision to enter a pot of the grapefruit marmalade I made a few weeks back.

The baking prep actually started with some... painting. I knew how I wanted to present my cake pops and I'd gotten these flower pot shaped holders online but they needed a touch of colour so I spent an entire evening experimenting with watercolours then building up the layers until I had the result I wanted.


The following day/evening, I baked and decorated my cake pops. As experimenting with a new recipe hadn't paid off, I went back to my old and trusted red velvet recipe. I reduced the cocoa content and increased the red colouring slightly for effect and everything turned out perfectly. It was a hot day however and the candy melt coating gave me an awful lot of grief. I'd planned on making red and green apples but I messed up the red candy melt so badly it became unworkable and I was left with just the green. Looking back, it probably wasn't such a bad thing, the effect of biting in an apple green pop to discover a bright red cake inside was really quite dramatic.

On the day of the competition, I bought a load of organic rhubarb, the pinkest, prettiest one I could find and set to work making custard and baking my best ever cake. After I'd finished, I was left with quite a lot of the pink stuff and just enough time to spare to bake another entry, so a rhubarb crumble traybake made it into the oven.

As I displayed my entries and looked at what I was up against, I hoped I'd get at least one prize (runner up was good enough) and that none of my entries qualified for the "epic fail" (good effort but didn't quite hit the mark) prize.


But I didn't win just one prize, I won three! OK, so clearly the jury wasn't as enamoured as I am with rhubarb because none of my rhubarb bakes got a mention. My cake pops however hit the home run. Not only were they best in their category (Small but Perfectly Formed), they also raked in the "Showstopper" prize which was picked by the jury out of all the entries. I think I did quite a few leaps of joy when my name was called out. The biggest surprise for me though was that my marmalade won the runner up prize. Considering this is only the second time ever that I've tried my hand at jam making and that I didn't actually follow a recipe, that's a fab result and one I'm still pretty chuffed about!

This win means I'm now a bona fide baker in our house and I no longer have to hide in my husband's shadow. We're officially a baking power couple :-)

In other news, I've been playing with plastic beads these past two weeks. I'd seen somewhere that by baking cheap plastic beads for a relatively short time, you can melt them and create accessories. I had a first go and it really worked. I chose to glue the little flowers to hairbands for my daughter but you could easily turn them into rings, brooches or hairclips.


I also had my nails re-done and opted for a 3D design. I'd been oggling those for a while so it was time to give it a go. I was worried I wouldn't be able to stop picking at it but so far I've been really good and a week in, they're still intact.

I'm currently working on a number of yarn based projects but you'll have to wait until next week to find out more. Have a lovely week folks!

Sunday, 1 June 2014

Week 22: rhubarb how I love thee!

I'm happy to report that week 22 was not "blah" like its predecessor but rather... tangy! Tangy like beautiful, delicious, pink rhubarb.

I love spring/early summer, the sun comes out to play, flowers and trees are blooming and my favourite fruits come into season. I also love that it's the season of rhubarb. And this week I've made the most of it, cooking rhubarb in a number of ways. 

First we had rhubarb fools, a quick and easy recipe stolen from Weight Watchers. 

To make these you'll need 450g rhubarb, 1 bag (24g) of raspberry jelly crystals, 200ml of boiling water, 200g of greek yoghurt, 4tbsp of sugar (or sweetener) and a couple of handfuls of porridge oats. Chop the rhubarb. Pour the crystals and water in a pan, once the crystals are dissolved, add the rhubarb. Cover and leave to simmer for 10 minutes, until the rhubarb is tender. Transfer the contents of the pan to a food processor and blitz the whole thing. Leave to cool for a while then add the sugar to taste and the greek yoghurt. Blitz again. Pour in glasses and leave to set. Just before serving, put the oats in a pre-heated oven at 180ºC for about 10 minutes to toast them. Sprinkle on top of the rhubarb fools and enjoy. 

After the fools came the classic combination of rhubarb and custard in the form of a cake. It was a baking experiment, one which I plan to enter in an upcoming baking competition so I won't be sharing my recipe just yet, or much about the cake for that matter. All I'll say is that it's a really good looking cake and it was truly delicious. Hubby and his colleagues got to be the judges of my first attempt. 


Finally, we ended the week with a luscious crumble. I used a James Martin recipe and it turned out perfectly. I only used about half the sugar in the rhubarb mix as I like it tangy and I also used a half flour/half oats mix for the topping. I served it with a dollop of clotted cream ice cream but double cream or custard would have done the trick just fine.


Outside my rhubarb obsession, I have been experimenting with cheap crafts this week. Inspired by a post I saw on Pinterest, I came up with two activities for my toddler.

First I recycled a cardboard box, strengthened it with Duck tape then made a series of holes in it with the help of a scalpel and a knitting needle. Add a (dirt cheap) bag of pipe cleaners and hey presto, hours of fun for the little person, arranging and re-arranging the pipe cleaners in the different holes. Although I must admit, I'm still not sure who had the most fun playing with it, our daughter or her parents.

Next I chopped a cardboard tube in bits of different size and stuck them to the side of a cupboard then I gave our daughter a bowl full of (again, cheap) pompons. She loved chucking the pompons through the tubes and delighted in the watching them fall back in the container. It really doesn't take much to entertain a small person, does it?


I've also explored the latest teenage craze this week, rainbow loom bands. A bag of these bands costs less than £2 at our local store. I've used my knitting loom to make single band bracelets, which was pretty easy. Now I need to find more designs to challenge myself or I'm at risk of quickly losing interest.

That's it from me for this week. Enjoy the sunshine folks x