I'm sorry I didn't post for the past couple of weeks, it wasn't for lack of inspiration, I have been very busy making things, from a knitted wrapover cardigan to plenty of sample rings... But I've not been very good at photographing them and time has been in short supply to write all about it.
A few weeks ago, I ordered a Gold Plated Spiral Cuff kit from Magpie Jewellery after spotting it in a magazine. I thought it looked like a lovely easy project that I could make in a couple of hours or less...
I couldn't have been more wrong! First of all, the "kit" was a bit disappointing, consisting of a length of gold plated copper wire, a length of enamelled colour wire and a couple of A4 photocopied sheets for instructions. Not a single image with the instructions! I'm quite crafty and found it difficult to understand what I was meant to do without any illustrations, I can't imagine what it would be like for a complete beginner!
Once I'd finally figured out how to manipulate the wire so the spirals would look more or less smooth, I made a start on the whole thing, still thinking it would take a couple of hours to complete. I ended up spending a whole day on it! The gold spirals didn't take so long to make but attaching each with the enamelled wire just took forever. Admittedly, I seem to have made a whole lot more spirals than the picture on the website suggests... But having finished the thing, I can't help but think it would have been really flimsy with less spirals. It still feels quite fragile to me as it is now. It is really pretty however...
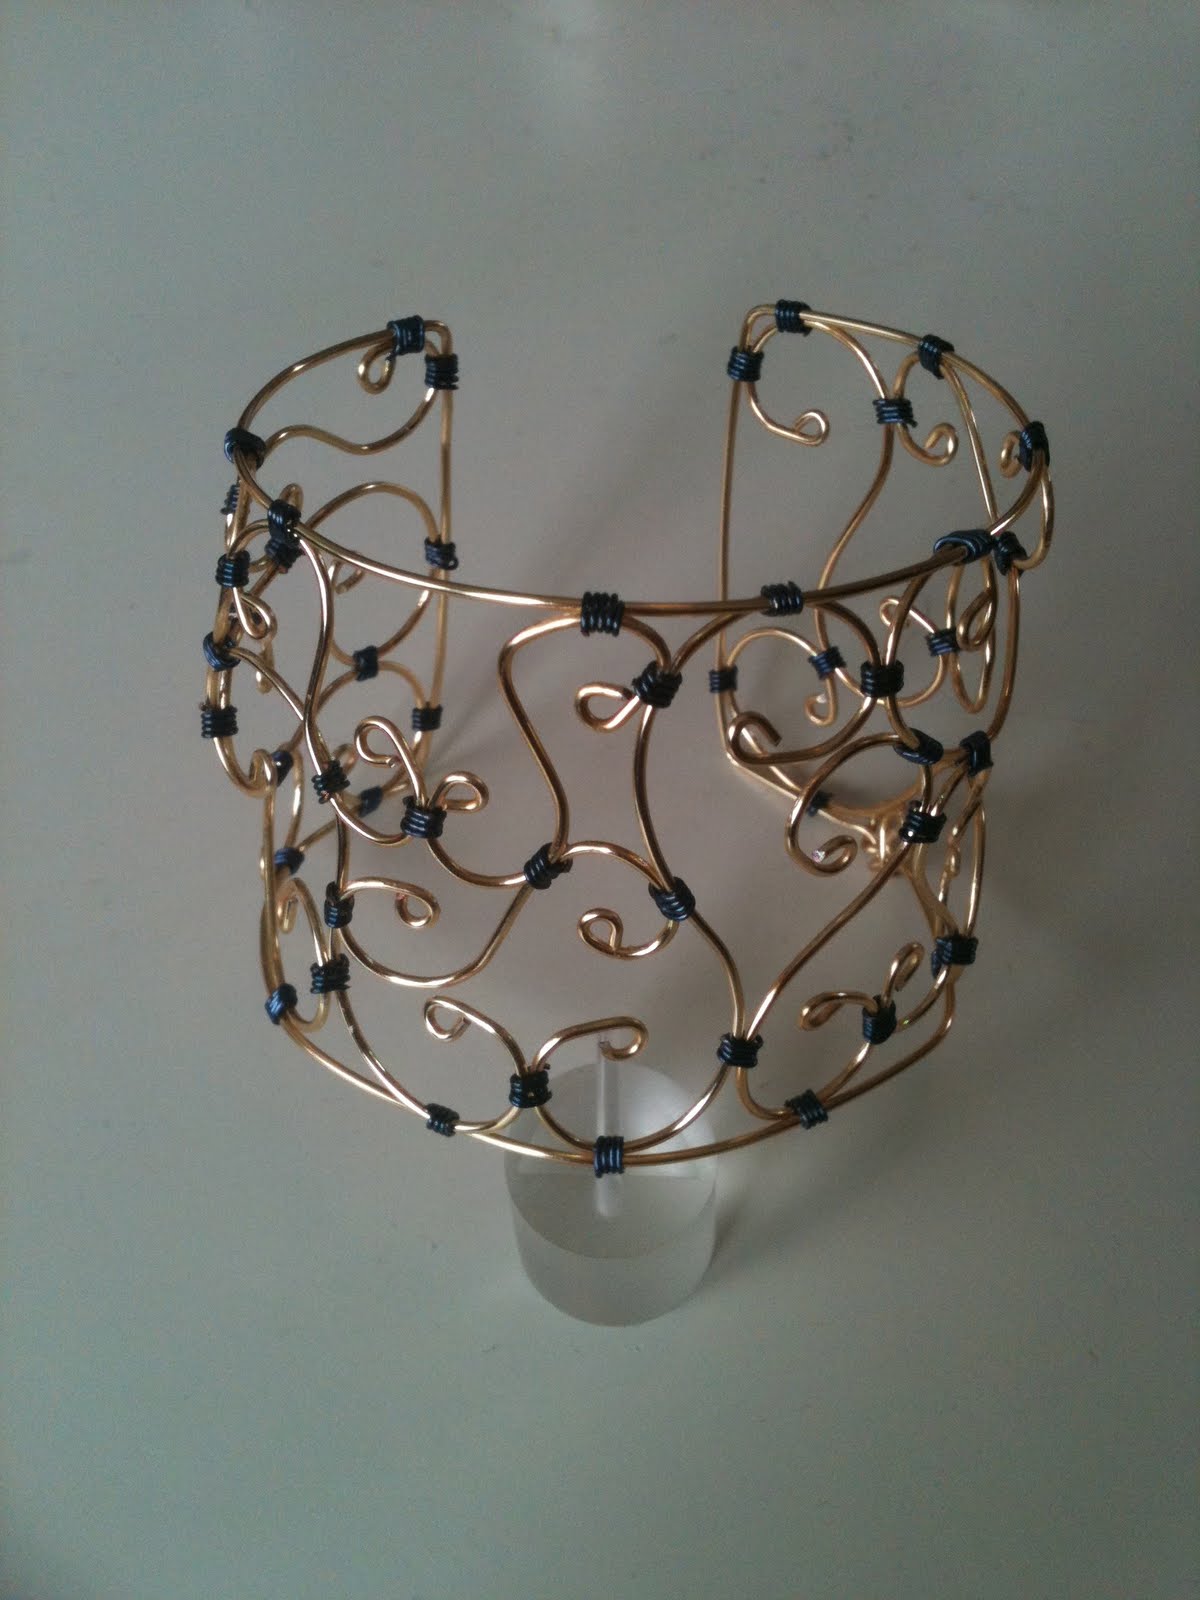
I'd love to make more, I'm sure I could sell these. But I'd really need to find a way to work faster if I want to make it profitable. And I need to find a way to protect my poor little fingers, because after a whole day working with wire, they were in shreds!
Whilst I'm here anyway, here's a little preview of more polymer clay rose rings I've been working on :-)
Showing posts with label polymer clay. Show all posts
Monday, 13 June 2011
Monday, 23 May 2011
Polymer clay roses and crystal balls
In the spirit of acquiring as many jewellery skills as possible, I have found myself experimenting some more last week, this time with polymer clay and with the making of crystal balls.
Knowing how to work with polymer clay has multiple advantages. Firstly, you can make really beautiful things out of polymer clay, from millefiori beads to roses, the possibilities are endless. It's a really versatile material, really easy to work with and you only need 30 minutes in a low temperature oven to harden it. Add a layer of varnish for a glossy finish and hey presto, you've made something gorgeous! Secondly, polymer clay is really cheap and makes a good practice run for those things one would like to make out of silver clay, which is obviously more costly!
For my first experiment, I have tried my hands at making polymer clay roses. It's actually a lot simpler than one would think: all you need is a number of pea size balls of polymer clay in the colour (or colour mix) of your choice. You then flatten the balls into little discs (they don't have to be perfect, in fact, the more irregular, the more natural the rose will look) and then you start rolling the discs around one another, curling the top edge for a more natural look. Once the rose is the size you want it to be, cut off the excess clay at the bottom, make a hole with a toothpick for threading and voilà, your rose is ready to bake!
I made two attempts, the first one is the darker one, the second, the lighter one. Once they were baked and varnished, I threaded them onto a wire ring shank to see how that would look. It doesn't show on the picture but the darker one has too much clay left at the bottom so it sticks out a little too high for a ring. But the second one looks quite convincing and with its lovely nude colour, it's very much on trend!
My only regret with both roses is that you can see the imprint of my fingerprints on the petals. I'd hoped it would become less visible once they were baked and varnished but not so. Next time I think I'll put latex gloves on to see if that reduces the marks.
Whilst researching polymer clay, I came across a tutorial on how to make a crystal ball pendant. So there was my second experiment for the week! I had some Swarovski bicones lying around that I hadn't put to good use yet so I figured, why not? I made one ball in each of the colours I had available and yes, you guessed it, I threaded one onto a wire ring shank to see how that would look! I love the result, it makes a great cocktail ring and I'll definitely be making a load of them to go in my Christmas market stall box.
Subscribe to:
Posts (Atom)


