Tuesday, 19 July 2011

This is how you make chocolate mousse!

It's no secret that Belgians do chocolate rather well. We Belgians just take the quality of our chocolate for granted, it's only after I'd moved here that I realised just how spoiled we are back home. It's also in London that I've learnt how special a good chocolate mousse can be.

Like many of my compatriots, I just learnt to make chocolate mousse the traditional way as a kid, it was always a favourite at school fancy fairs. And whenever I make it here for friends or colleagues, it's always a massive hit. Now that I have this blog I thought it'd be nice to share my recipe so you can all enjoy a good old traditional Belgian chocolate mousse :-)

Chocolate mousse is easy to make, all you need is three ingredients: good quality dark chocolate, sugar and eggs. I must insist on the quality of the chocolate, that's where the secret for success lies. I use Callebaut cooking chocolate, I buy huge slabs of it whenever I'm in Belgium, but if I haven't got any in stock for any reason then I opt for Green & Blacks cooking chocolate. Don't be a scrounger and buy cheap rubbish as it will seriously affect the end result.

And now, here's for how to make chocolate mousse! Per person you will need:

- 1 egg
- 1 tbsp of granulated sugar
- good quality dark chocolate, about two fingers worth (see picture below)


Separate the eggs and put the yolks with the sugar in one bowl and the whites in a separate bowl.


Mix the yolks and the sugar until smooth and beat the whites with an electrical beater until stiff.


Melt the chocolate au bain marie. You can do it with a microwave but if you do, be very careful not to burn the chocolate!


Slowly pour the melted chocolate in the bowl with the yolk and sugar mix and keep stirring whilst doing so.


Finally, add the whites gradually and fold them in gently. Don't be too rash here, you want to keep the air in so the mousse is nice and fluffy!


All that's left to do at this stage is to pour the mixture in ramekins and leave them to set in the fridge for a few hours and there you have it, delicious chocolate mousse!


Off course, the best bit about making chocolate mousse is that you get to lick the spatula at the end, as my little assistant will confirm ;-)

Wednesday, 29 June 2011

A pair of summer shorts... at no extra cost!

I desperately need a pair of shorts for the summer but I can't find anything suitable. I'm afraid my pins just aren't slim enough for all those skimpy little shorts in the shops! So what can I do?

Well, I just happened to have a pair of damaged jeans in my cupboard so I decided to chop them to make a pair of shorts. So far, pretty obvious! But then I started thinking that it would look quite nice to have a nice little trim to my shorts... so I had a rummage through my scrap fabric pile and hey presto, found a lovely flower print that would be a perfect match to many of my tops.

1 hour of chopping, pinning, pressing and sewing and voilà, a pair of summer shorts that didn't cost me anything and that are the perfect length for me! How cute are they?

Monday, 27 June 2011

How to keep yourself entertained when there's nothing on telly...

In my opinion, summer TV schedules really are awful. The good thing though is that not catching up on my favourite TV series frees up an awful lot of time which I can put to good use... crafting mainly! Now most of last week has been spent tidying up and decluttering my house but I still found time to make a few things along the way.

I bought this "Toho Elegant Jewellery Kit" from Magpie Jewellery a little while ago. It comes with pretty much everything you need and has very detailed and graphic instructions, I loved it as soon as I opened it!


The drawings are so clear, I got the whole ring completed in no time and this despite the fact I was slightly impaired after having burnt myself whilst cooking that evening. I love the result, it's super cute. Unfortunately, I'm not sure I'll be able to wear it as I'm quite sensitive to metals and the sieve the beads are threaded onto looks like something that could trigger a reaction.


I've also carried on working on building up my stock of cocktail rings so here are the latest additions to my collection:


Monday, 20 June 2011

Perfecting the art of the cluster ring

Some designers and independent retailers have shown interest in my cocktail rings recently so I've been working hard at building a collection that I could leave in a shop.

Cluster rings are always striking and people always compliment me on them when I wear one. I have learnt two methods to make cluster rings and have been practicing and perfecting the art of using both.

The first method consists in threading beads onto a wire ring shank. Here are my latest creations using this method:


The second method consists in wire wrapping beads onto a ring base with a loop. Swarovski Elements ring bases are my absolute favourite. Here's a little collection in blue and lovely white flowers bouquet:


I'm sure you'll be seeing a lot more of those in the next few weeks and who knows, maybe in a shop near you really soon!

Monday, 13 June 2011

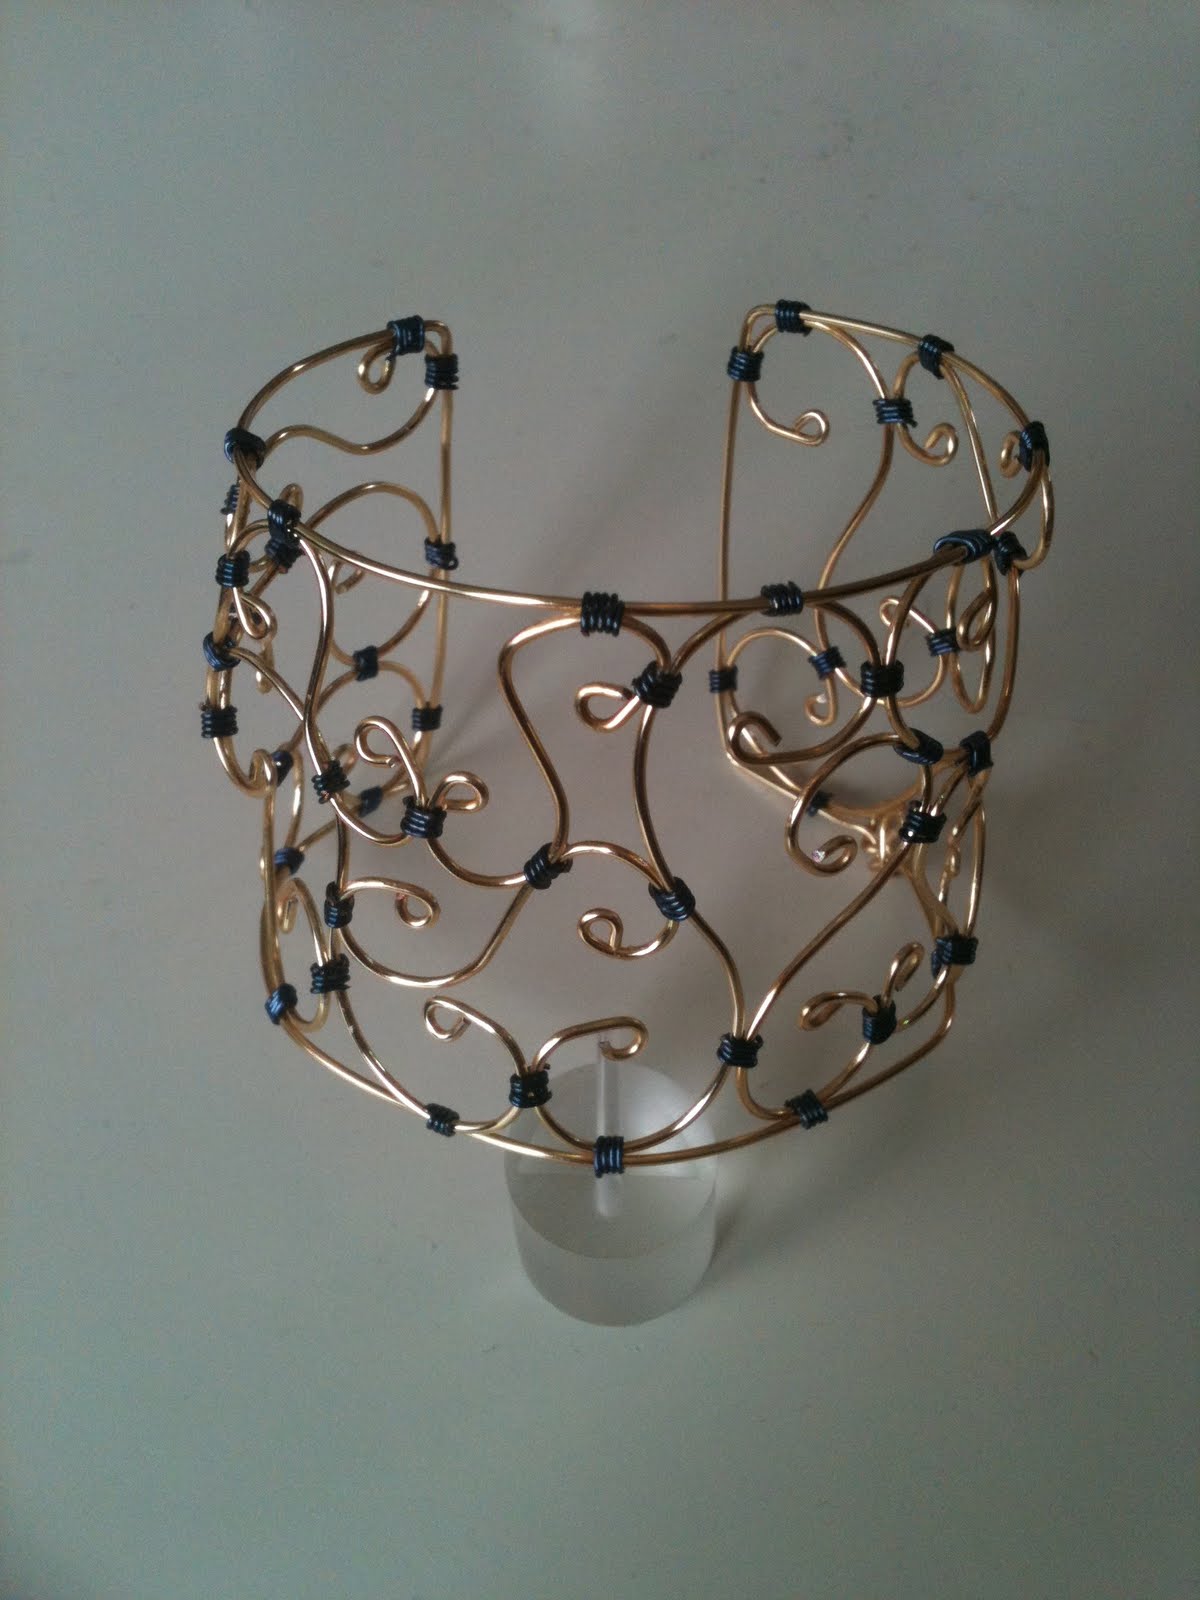
Wire bangle

I'm sorry I didn't post for the past couple of weeks, it wasn't for lack of inspiration, I have been very busy making things, from a knitted wrapover cardigan to plenty of sample rings... But I've not been very good at photographing them and time has been in short supply to write all about it.

A few weeks ago, I ordered a Gold Plated Spiral Cuff kit from Magpie Jewellery after spotting it in a magazine. I thought it looked like a lovely easy project that I could make in a couple of hours or less...

I couldn't have been more wrong! First of all, the "kit" was a bit disappointing, consisting of a length of gold plated copper wire, a length of enamelled colour wire and a couple of A4 photocopied sheets for instructions. Not a single image with the instructions! I'm quite crafty and found it difficult to understand what I was meant to do without any illustrations, I can't imagine what it would be like for a complete beginner!

Once I'd finally figured out how to manipulate the wire so the spirals would look more or less smooth, I made a start on the whole thing, still thinking it would take a couple of hours to complete. I ended up spending a whole day on it! The gold spirals didn't take so long to make but attaching each with the enamelled wire just took forever. Admittedly, I seem to have made a whole lot more spirals than the picture on the website suggests... But having finished the thing, I can't help but think it would have been really flimsy with less spirals. It still feels quite fragile to me as it is now. It is really pretty however...


I'd love to make more, I'm sure I could sell these. But I'd really need to find a way to work faster if I want to make it profitable. And I need to find a way to protect my poor little fingers, because after a whole day working with wire, they were in shreds!

Whilst I'm here anyway, here's a little preview of more polymer clay rose rings I've been working on :-)