Monday, 15 September 2014

Week 37: Pregnancy woes

This post is most likely going to ruffle some feathers and possibly offend some people so my apologies in advance if any of the following upsets you. But sometimes, just sometimes, things just need to be said and while I try to keep it all politically correct most of the time, I can't hold back any more on this one.


See the photo above? Nice picture, right? I'll let you in on a little secret: It's a lie, one big fat lie. I fucking hate being pregnant! There, I've said it! Now at this point, let me make it very clear that I am deeply grateful for having previously carried a healthy child to term and for being given the opportunity to do it a second time. Yes, I am indeed very lucky and blessed, I do not deny that. Does it make me like pregnancy any more? No, it really does not.

So what is so terrible about being with child? Well the sickness for a start. I'm one of those who suffers with the ridiculously badly named "morning" sickness. It's all day, every day, there's just no let up. I still can't decide which is worse, the relentless nausea or being able to draw up a list of food that are really horrible to sick up (trust me, some are definitely worse than others!). And yes, before you start asking me if I've tried ginger or seabands or standing on my head while chanting "om" (ok I made that one up), I have tried everything. Some remedies offer short lived relief, some make it more manageable for a few days or so but the darn nausea is always there, there is not a day without it.

And worse of all, things that should be really good for me, make it so much worse. Taking my vitamins? guaranteed to induce a bad bout of nausea. Brushing my teeth? almost guaranteed to have me hug the porcelain bowl within seconds. There are days where I feel like I can't win and it just gets to me.

If relentless nausea wasn't enough, I'm tired of being tired. And I'm tired of pregnancy insomnia. What's up with that, seriously?

Oh, and baby brain, don't let me start on baby brain. I don't care that those narrow-minded male scientists have decreed baby brain does not exist (probably the same guys who decided to call it "morning" sickness), as any expectant and new mums can attest, it's very real. I find it crippling. I'm Miss Organised, I'm known to be on top of my game at work and everywhere else, all the time, and that's the way it should be. So when baby brain interferes and I have to re-do the same thing multiple times because I can't focus properly on it, it pisses me off. I have to triple check everything I do to make sure I don't mess up or I haven't forgotten something really important. It's time consuming and well... tiring.

And finally, for my biggest confession to date: I honestly do not like the pregnant form. I don't like my lump, erm, bump. Maybe it taps too deep into my body insecurities or maybe I don't like what's associated with said bump and all the limitations it brings, whatever it is, I don't find it beautiful, womanly, sexy, nope, none of that. I just don't get the attraction.

So, if any of you readers know me personally, don't ask me how I'm feeling unless you're ready to listen to me moaning about how shitty I'm finding pregnancy. If I snap at you for no good reason, it's probably because I'm having a particularly bad day with the nausea and I'm feeling really down. If in a conversation I suddenly glaze over, I haven't lost interest, I'm probably concentrating very hard so as not to retch in front of you. Oh, and please refrain from rubbing the sodding bump, it makes me feel even more self conscious!

I'm sure for some, pregnancy is an enlightening and beautiful time. I'm clearly not one of those, sorry for the moan guys.

Sunday, 7 September 2014

Week 36: Scrumptious mango chutney

I took a little holiday from the blog. It started with a proper holiday with no access to internet and then it kind of dragged on for a bit because I've been really busy. If only because I'm cooking another goosling, yep that's right, I'm expecting baby number 2 and it's making me feel tired and rubbish (and happy too, of course). I'll keep my pregnancy woes to a future post while I move on to what actually brought me back onto the blog: a pretty darn amazing mango chutney!


Yesterday, I spotted on my greengrocer's Facebook page (yes, they're funky like that at my local greengrocer) that they had boxes of 12 mangoes going for £2. I just couldn't resist the bargain and headed straight down to bag myself some of that sunny goodness.

But what to do with 12 mangoes? Why, chutney of course! It was my first attempt and I am proud to say, it's turned out so good that I have actually been tempted to eat the whole 2kg of chutney with a spoon. As I am generous like that, here's the recipe for those who would like to try it:

Ingredients:
- 1.3kg mangoes, diced in roughly 2cm cubes (weight when skinned and stoned) - it's best to use mangoes that are slightly under ripe as they'll hold their shape better
- 350g onions, finely chopped (weight when peeled and chopped)
- 2 garlic cloves, peeled and chopped
- 300ml white wine vinegar
- 550g sugar
- 1 orange
- 1 red chilli, chopped
- 1/4 teaspoon each of: allspice, cardamon seeds, ground cinnamon, coriander seeds, ground ginger, mustard seeds, peppercorns
- 4 cloves
- 2 bay leaves

Method:
- Tie the spices, red chilli, cloves and bay leaves in a muslin bag
- Put the onion, garlic, vinegar, mango and muslin bag in a pan
- Simmer gently for about 20 minutes until the fruit and the onions are getting soft
- Grate the zest of the orange finely and squeeze out the juice, add to the pan and cook for 5 more minutes
- Remove the muslin bag
- Add the sugar and stir over low heat until dissolved
- Bring to a steady boil and cook until it is the consistency of a soft rather than stiff jam
- Leave to cool for about 10 minutes before spooning into clean jars

And there you have it, a delicious mango chutney. If you try the recipe, let me know what you thought of it.

Saturday, 2 August 2014

Week 31: A t-shirt dress tutorial

It's been a great week. If only because I managed to make a second t-shirt dress and take enough pictures to write a tutorial. So here it is:

1. I've used a £2.50 t-shirt from Next. I measured on my daughter where her waist was and added a 1.5cm seam allowance. Before cutting, I put a strip of iron-on interfacing to stabilise the fabric.

 2. I used the whole width of my fabric but measured the length of skirt I needed + 7cm of seam allowance. I then folded 2 cm at the top of the fabric and pressed it then repeated the operation. This folded edge will become the gutter in which to insert an elastic.
 3. I stitched my gutter as close to the bottom edge as possible.
 4. I measured a piece of sewing elastic to be roughly the same size as the cut edge of the t-shirt. To insert the elastic in the gutter, I tape it to the end of knitting needle and push it through.
 5. Once you have inserted the elastic, pin it in place so it is flush with the raw edges of the fabric and as close to the seam you just made as possible.
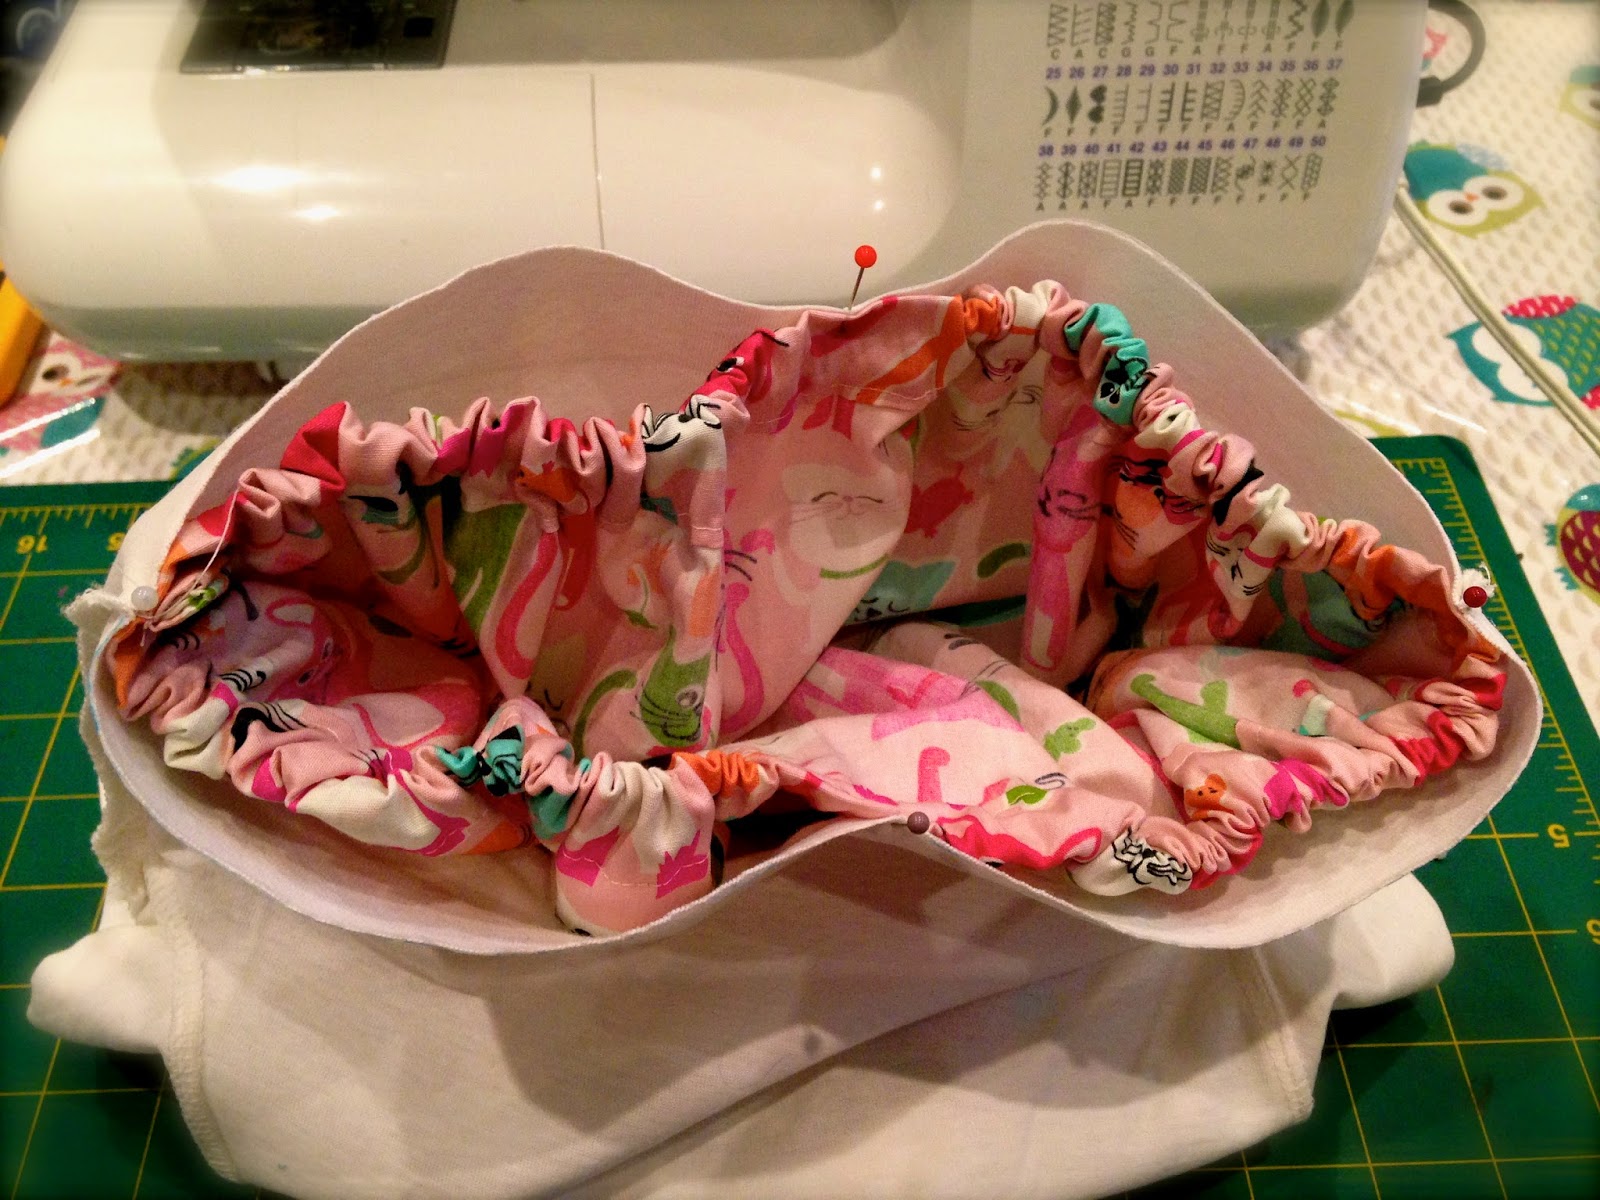
6. I've used a French seam for this skirt, they're meant to be stronger for children's clothes. So, if you're new to a French seam, what you do is make a small seam (0.5cm) with the wrong sides of the fabric together.
 7. You then turn your fabric inside out and do a larger seam (1cm) with the right sides together. That means there should be no raw edges showing on your seam.
 8. By using this seam, the elastic will have been trapped twice in the seam as well.
 9. At this stage, the skirt part is nearly done. You could just seam the bottom and use it as it is but as we're making a t-shirt dress, there's a few more steps for you to follow.
10. Mark the 4 cardinal points of you skirt with pins, so the two edges and the two middle points.
 11. Do the same with your t-shirt and match them up, right sides together.
 12. Pin the hell out of it so it won't shift when you're stitching it. While pinning, try and push the elastic towards the seam so it doesn't catch when you're stitching the skirt to the t-shirt and create bulky seams.
 13. It's time to attach the two pieces together. I find it easier to have the t-shirt underneath so you have a smooth surface to "glide" on and you can keep an eye on the gathering of the skirt.
 14. Finally, all that's left is to seam the bottom of the skirt. I've used a 1.5 cm seam folded and pressed twice.
 15. Et voilà, you have made a t-shirt dress! Well done you!
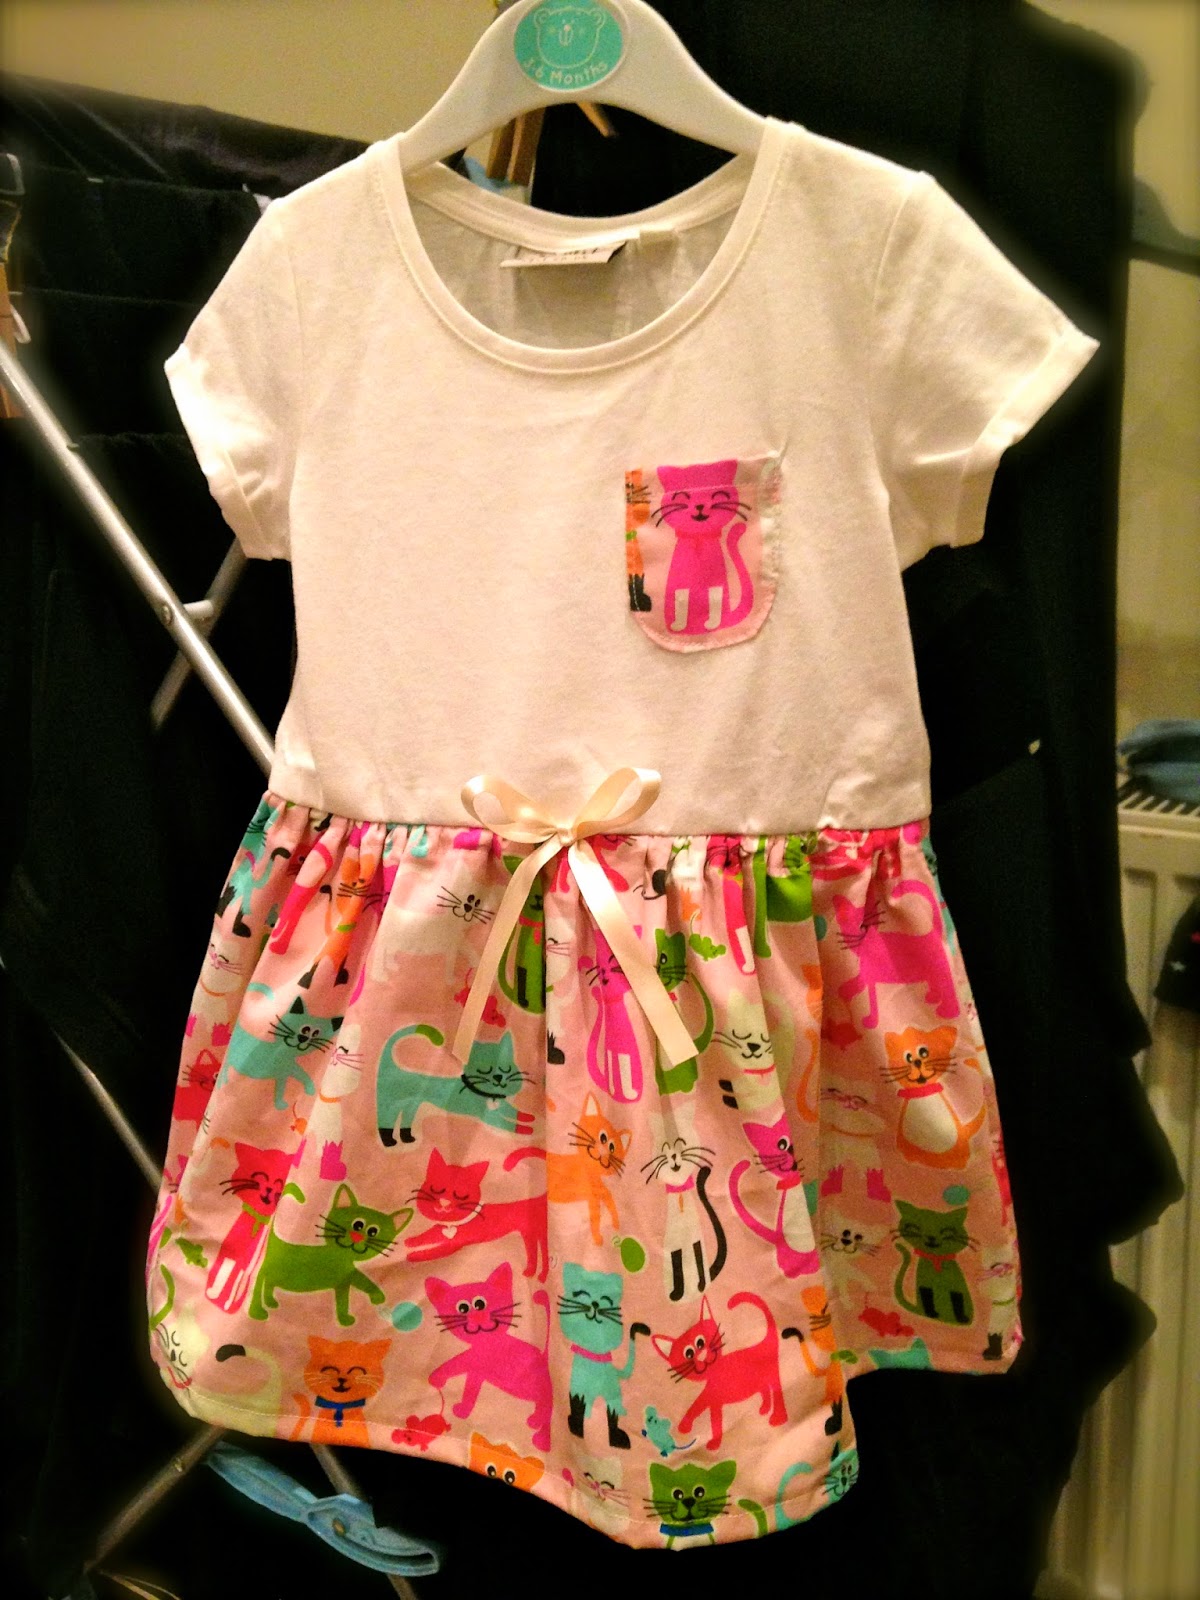
 16. I've added a couple of finishing touches to mine. A pretty little ribbon at the front of the skirt and a a chest pocket. Not mandatory, but they're pretty.

My daughter was so excited to see her dress in the morning, she practically begged me to put it on. She then ran to the mirror to admire herself. Look at that proud grin! It made it so worthwhile!


I hope you enjoyed this tutorial. If you have any questions, feel free to ask!

Sunday, 27 July 2014

Week 30: Maxi dress, mini dress

As my clients have more or less all gone on holiday, it's been eerily quiet on the work front. That means I've finally had some prime crafting time and that makes me so happy!

I'm on the short side, but just not quite short enough to fit into most stores' petite range so I often find myself having to shorten newly bought clothes, the worst offenders being trousers and long skirts. I've recently purchased a really beautiful, allbeit simple, maxi-dress which needed shortening by a good 4 inches. I'm glad to report that is now done and I'm very much looking forward to wearing my dress. 


A little while ago, I came across a fab online tutorial on how to make a t-shirt dress for a toddler. I have tons of small length (50cm-1m) of really pretty lovely fabric in my stash and this seemed like a great way to use some up. I've bought a small selection of £2.50 t-shirts from Next and paired them with some of the fabrics I had. All I needed was some free time to make the t-shirt dresses.

I had in mind to turn my efforts into my very own tutorial (I haven't exactly followed the one mentioned above) but I got a little carried away and forgot to take pictures along the way. Never mind, as the first attempt was a roaring success, I'll be making a couple more this week and I'll use those as a tutorial for you lovely readers.


All in all, not counting my time obviously, I reckon this little t-shirt dress cost me less than £10 to make. Pretty good value for a one-of-a-kind item, non?

I can also say that it fits my daughter perfectly but she was too wriggly for me to take a decent picture. Maybe in one of the next dresses. Something for you to look forward to next week :-)

Sunday, 20 July 2014

Week 27, 28 & 29: Playing catch up

So it seems I haven't posted for the past 3 weeks, eek!

Early July was just a bit frantic with work, it was quarterly reports time and that's always time consuming and a bit stressful. I seem to remember crashing with exhaustion one Sunday evening and saying "fuck it" to writing the blog. Sorry!

Then last week I was armed with good intentions but I was defeated by my internet provider who conked out on me for the whole evening, just as I was ready to write my update. I thought I'd just write on the Monday instead but I forgot, oops! Re-sorry!

So what's happened these past few weeks? well, loads! Some good like my daughter developing an entire vocabulary nearly overnight and my planning a street party with my super duper neighbours, some not so good, like losing (albeit temporarily) a client and thus a huge chunk of my income on the same day my hubby got a gig cancelled on him, leaving us in a rather precarious financial situation.

I have cried and worried and not slept over this whole work and money thing but I'm keeping faith that this is just a period of change and that something wonderful is just around the corner for hubby and me. We just need to ride this storm and keep thinking of new ways to generate an income and somewhere down the line, we'll realise this was a key turning point for us, one that was scary but probably needed.

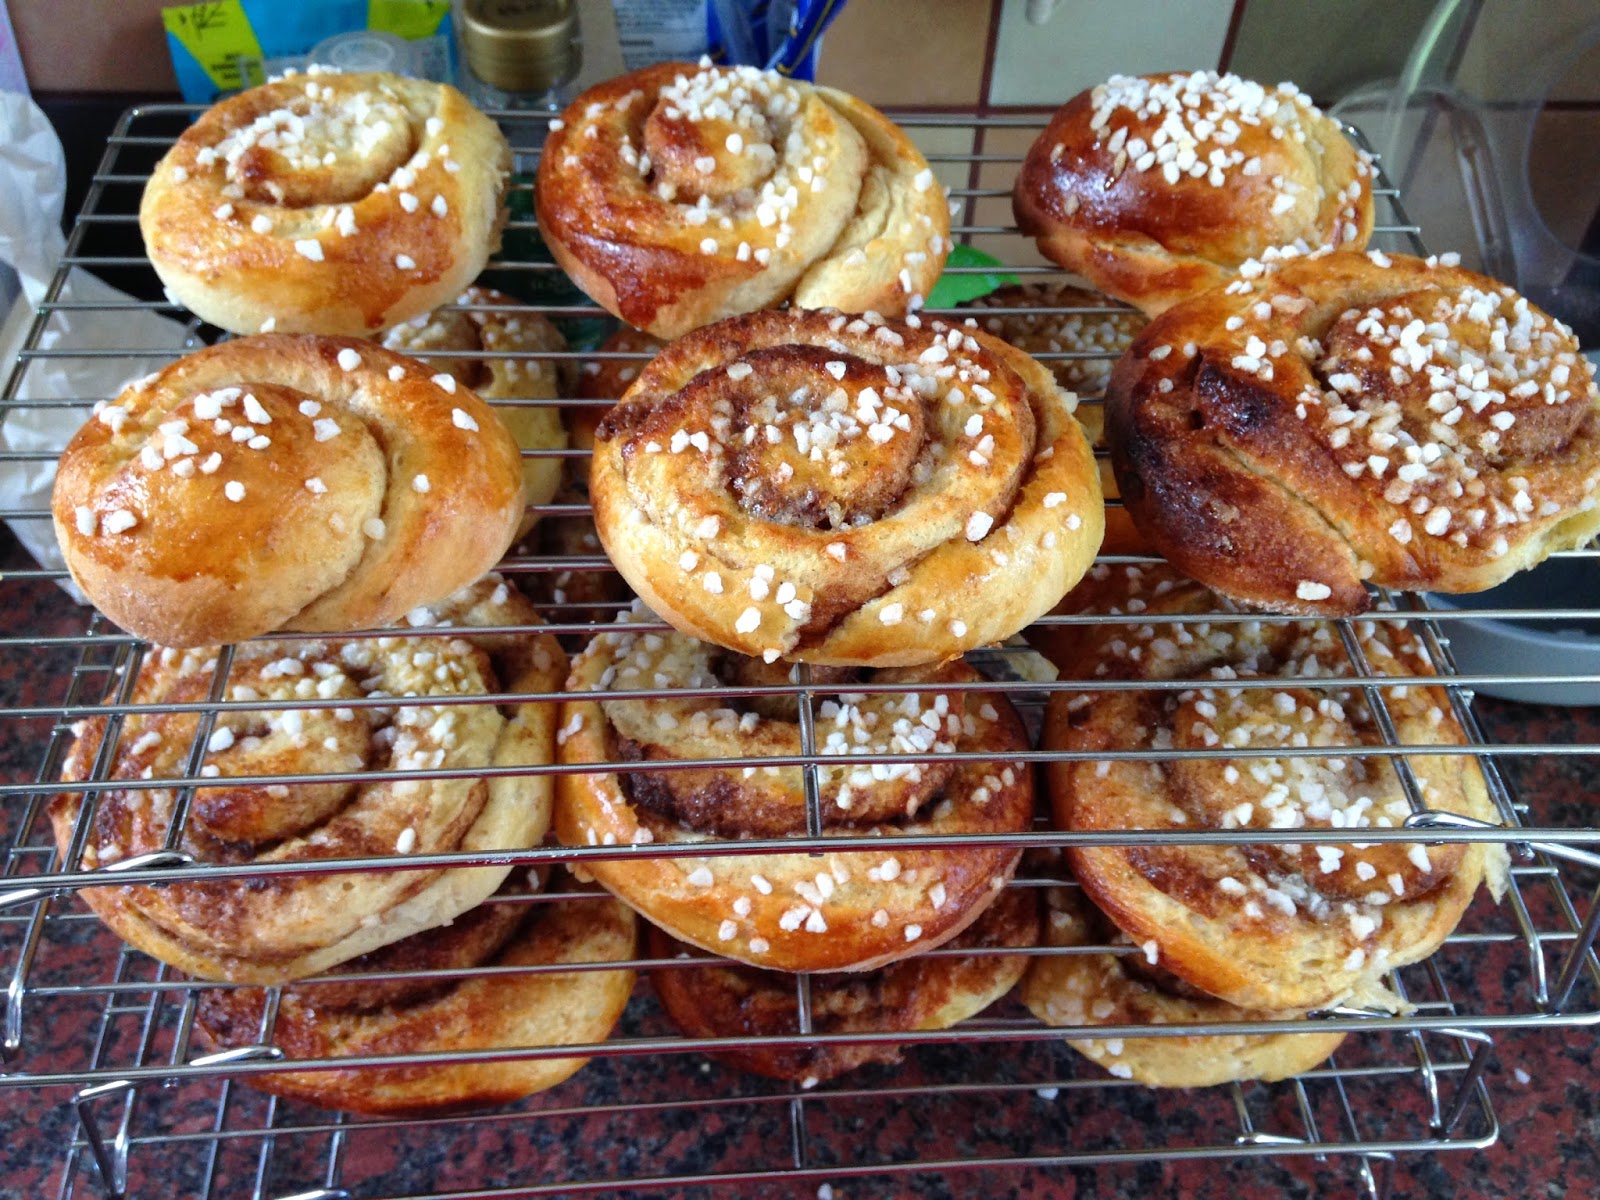
As always, there's been much baking and cooking. A couple of noteworthy experiments were frozen yoghurt lollies and Swedish cinnamon buns.

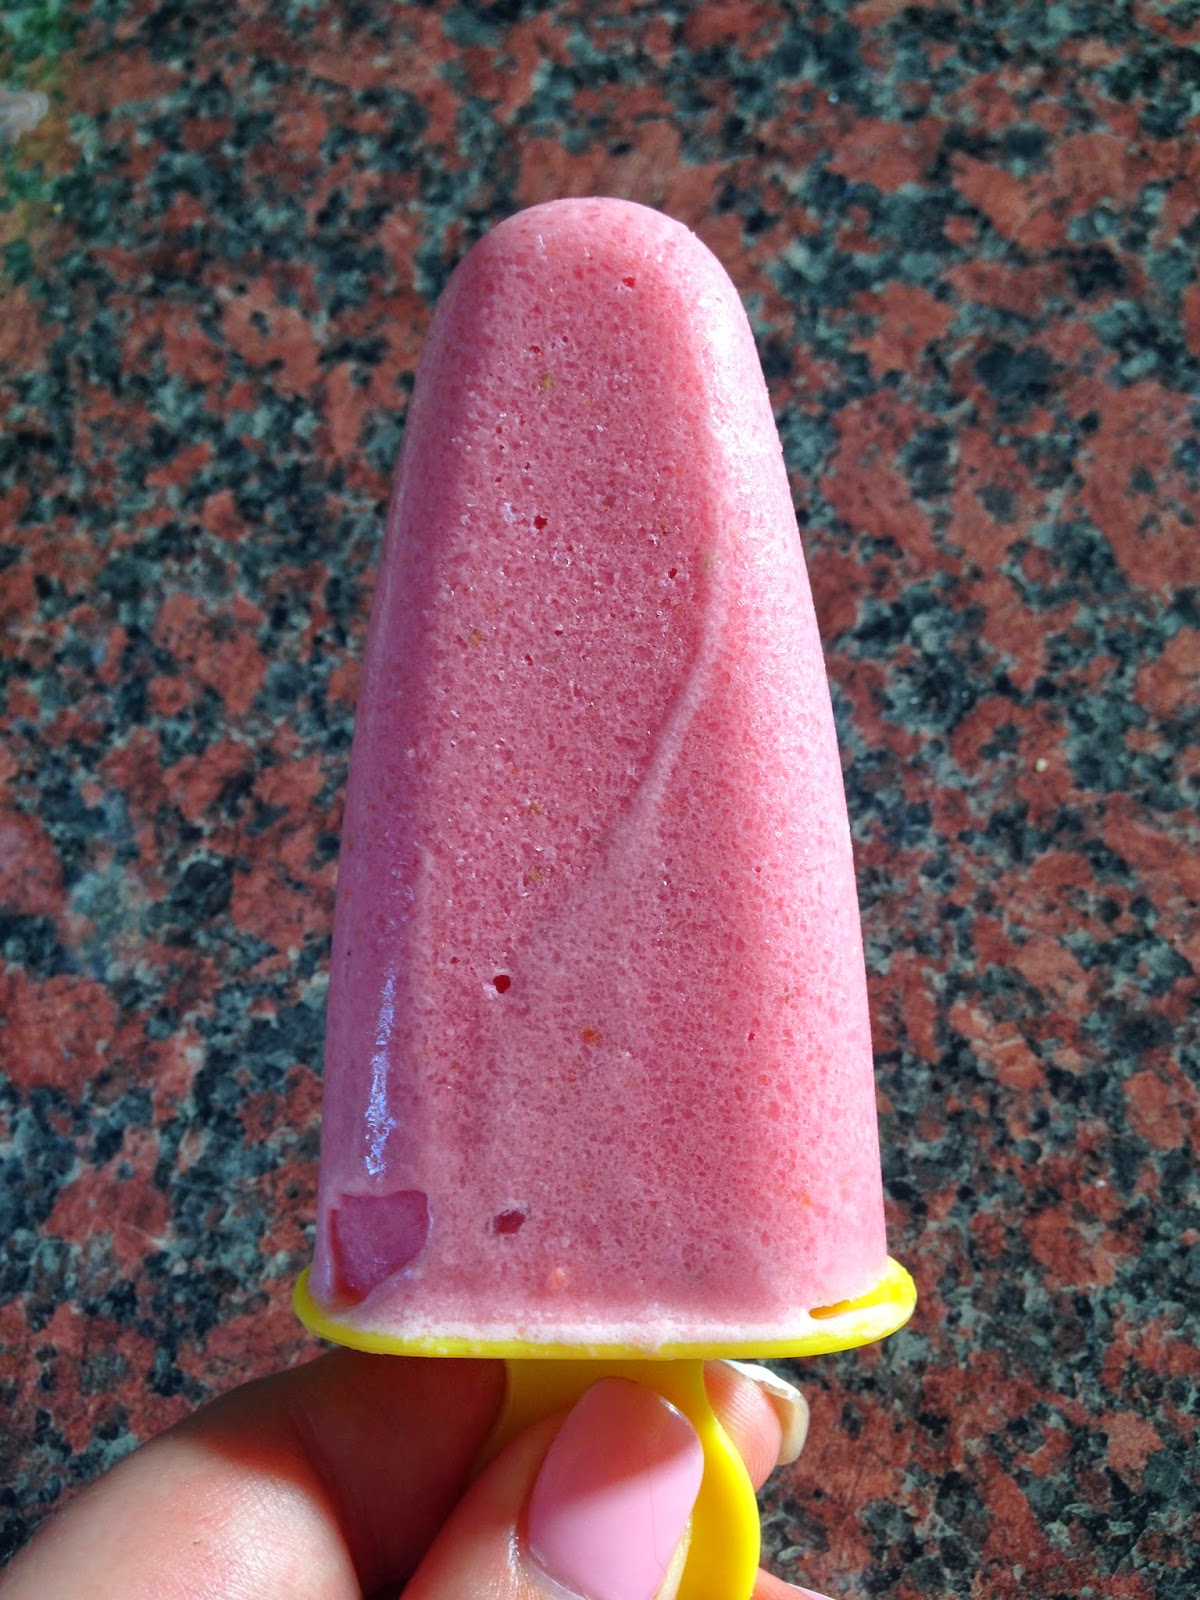
For the frozen yoghurt, I simply blended strawberries with greek yoghurt then sweetened to taste.
I then put the mixture in a tub and left it in the freezer for a few hours until frozen through. Then I whizzed the frozen yoghurt in the blender again. That's to break down large ice crystals and add a bit of air to the yoghurt, thus making it softer.
Once blended, I transferred the yoghurt to lolly moulds (Ikea sells some cheap ones) and left them in the freezer for a day.
The big test of course is whether or not our little madam will like them but they were an instant hit.
The finished product


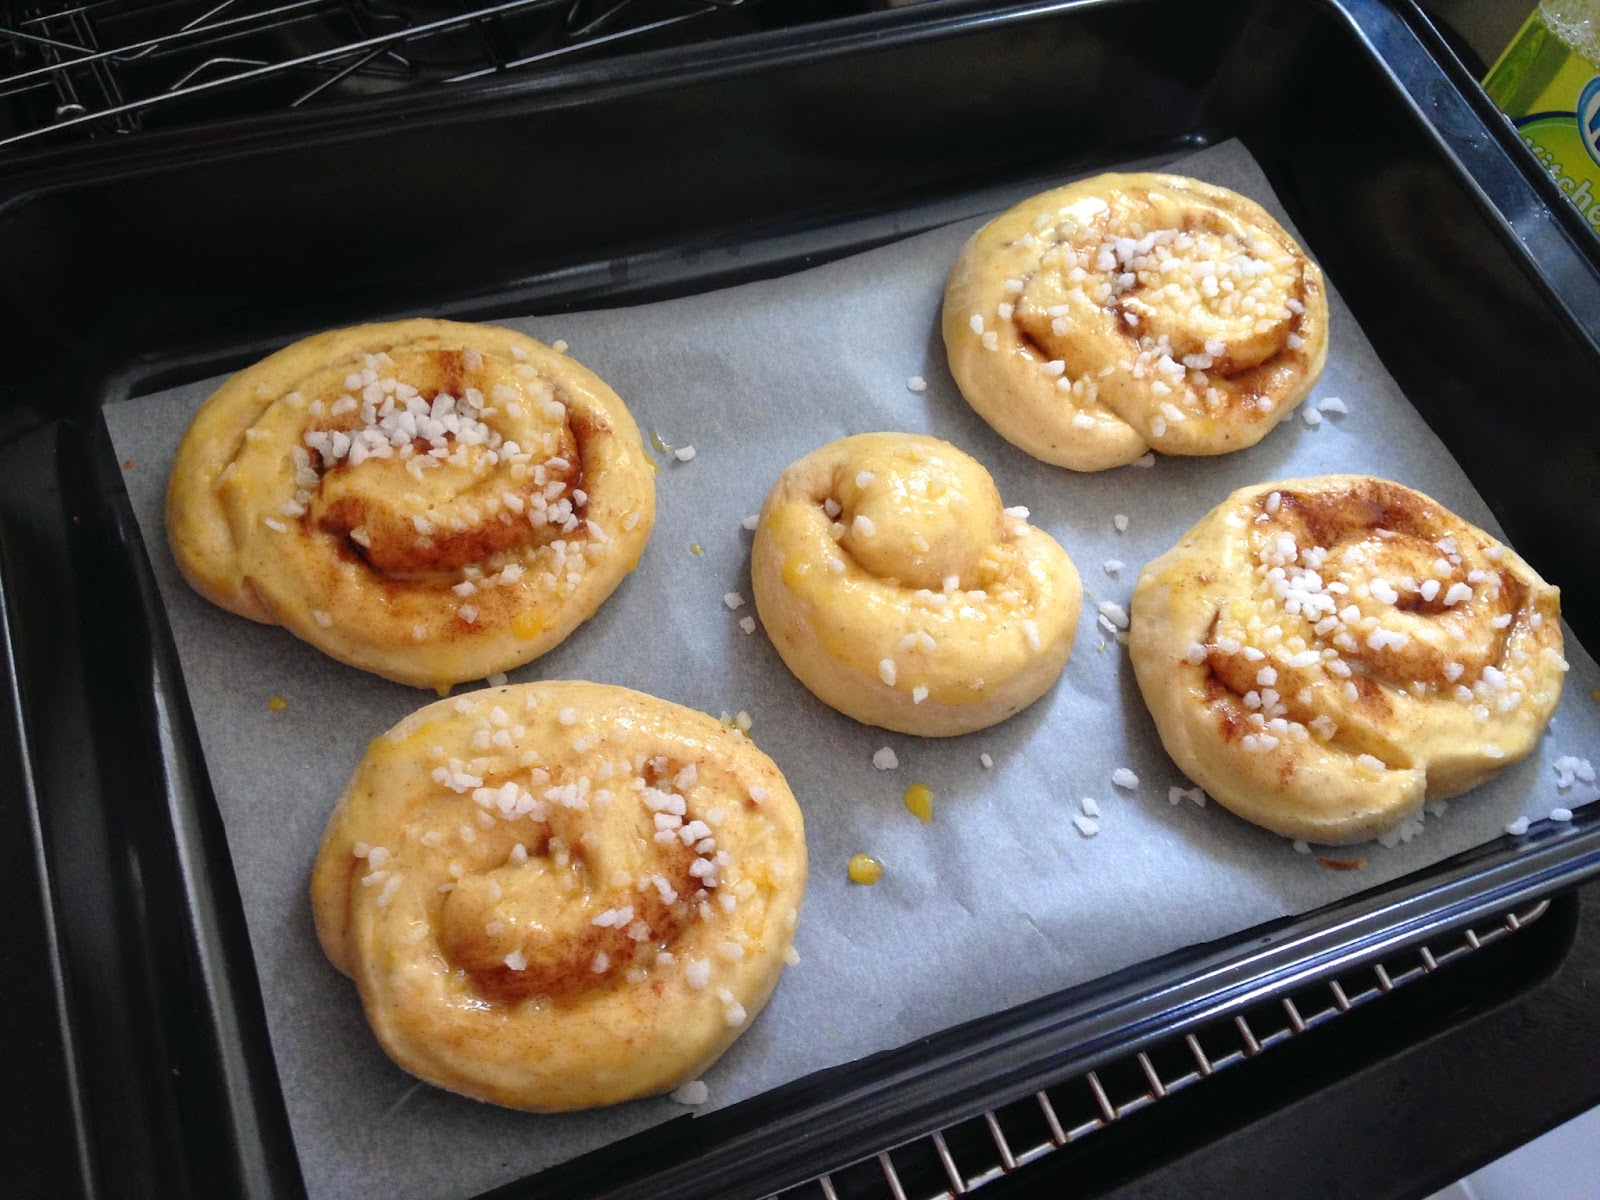
I can't really take credit for the cinnamon buns other than I asked my swedish colleague for her recipe. After that, I entrusted it to my expert husband and he went to work with it. The finished product was a bit on the large side but they were really delicious. We'll be giving these a go again in the near future.

The dough pre-being rolled

The buns ready to go in the oven

The finished buns. Nom nom!
I haven't been very productive on the craft front, instead I have spent a lot of time reading. I think after all the stress and worry of the last few weeks, I just needed the quiet contemplation that reading a good novel offers.

Until next time dear readers!